
Revision sheet
Ureteroscopy + laser lithotripsy
5 steps, each one the authored title and caption from the interactive animation, with the frame captured from that step. Read it before the case, or print it and work through the steps in order.
Teaching only, not for diagnosis or treatment decisions. The text on this sheet is the animation's own step copy, reproduced verbatim.
UrOops3D · UroRef · © Nity G
- 01
Bladder view: cystoscopy and the safety wire
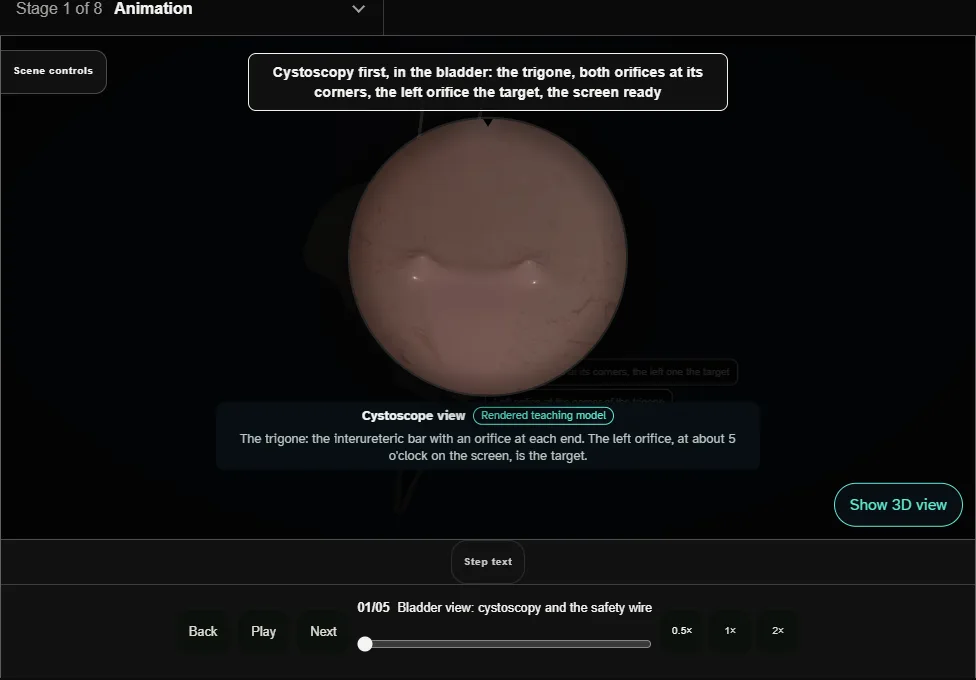
- Cystoscopy first and a proper look at the bladder: the trigone, both orifices, the left one the target.
- A 0.035 inch safety wire goes up the left orifice under screening to the kidney.
- It is the centre wire, placed first, and it stays for the whole case: the bridge across any perforation and the rail for any stent.
- 02
Second wire through the semirigid scope
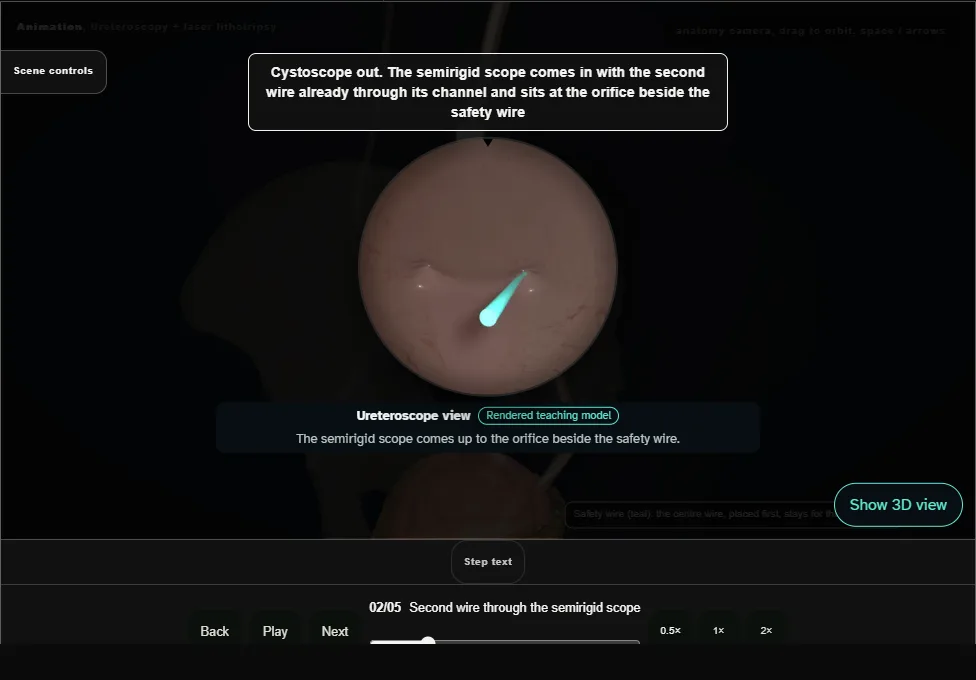
- The cystoscope comes out and the semirigid ureteroscope goes in with the second, working wire already through its channel.
- That wire is advanced up the ureter through the scope and exists only to guide it.
- Both wires are held gently taut and the scope is railroaded over the working wire to the stone, every centimetre under vision.
- A semirigid scope stays straight: the ureter straightens over it, off its resting curve across the iliac vessels, which is why the brim is where a semirigid scope catches.
- A catch is crossed by withdrawing, realigning and advancing.
- Never advance against resistance.
- 03
Dust it, never chunk it
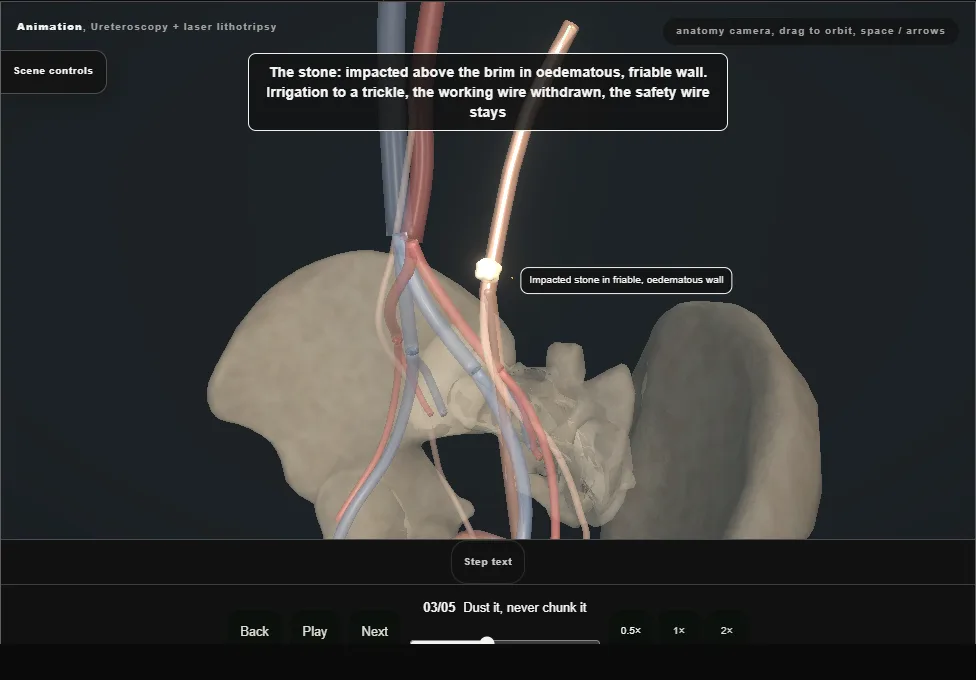
- The working wire is withdrawn once the stone is seen; the safety wire stays.
- The holmium or thulium fibre a few millimetres beyond the scope, its tip seen on the stone and off the mucosa before every activation.
- Low energy, face by face, painting the stone to dust with irrigation kept to a trickle.
- Never fragment in the ureter into large pieces: they scatter, they do not pass, and dragging them is how a ureter avulses.
- 04
Clearance: gravity first, basket if needed
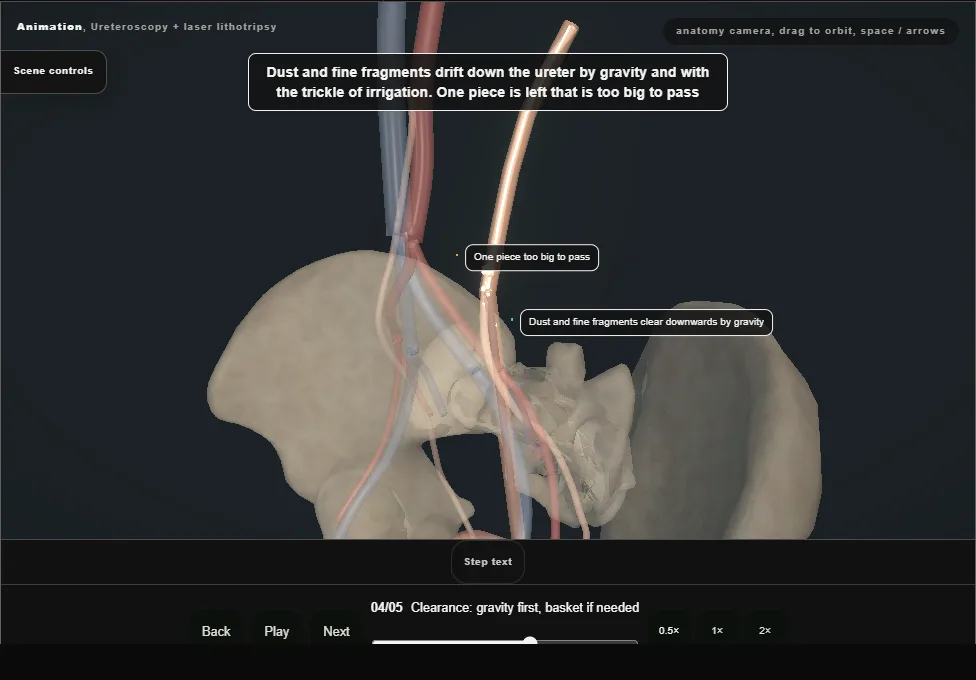
- Dust and fine fragments clear downwards by gravity and the trickle of irrigation.
- A piece too big to clear on its own is taken with a nitinol basket, one fragment at a time: the basket passed beyond it, opened, closed around it, and the test before any pull, drawn to the scope tip without the basket bowing or the wall dimpling.
- A fragment that resists is released and lasered smaller, never pulled.
- Removing one fragment does not clear the ureter: the dust is left to pass.
- 05
Exit + selective JJ stent
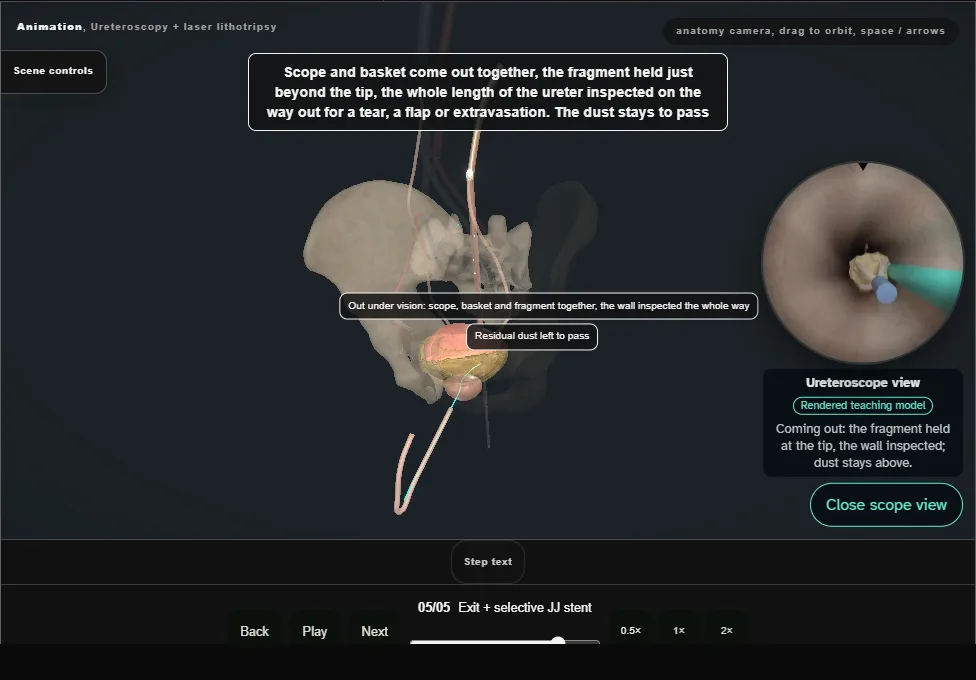
- Scope and basket come out together with the fragment held just beyond the tip, the wall inspected the whole way down; the dust is left to pass.
- Uncomplicated ureteroscopy needs no routine stent;
- one is placed over the safety wire for wall injury, oedema, residual stone or uncertain drainage, with the distal coil seen in the bladder and the proximal coil on the screen.
Derived from pelvis/UrslScene.tsx at build time: every step title and caption above is the authored
ProcedureDef text, reproduced verbatim, and this page shares its readable-points renderer with the animation
itself. 5 of 5 steps have a captured frame.
Text fingerprint ec34ffd0e46a4779. A caption edit without a re-capture fails the production
check, so the sheet and the animation cannot drift apart silently.