
Revision sheet
Artificial urinary sphincter: perineal
11 steps, each one the authored title and caption from the interactive animation, with the frame captured from that step. Read it before the case, or print it and work through the steps in order.
Teaching only, not for diagnosis or treatment decisions. The text on this sheet is the animation's own step copy, reproduced verbatim.
UrOops3D · UroRef · © Nity G
- 01
Orientation
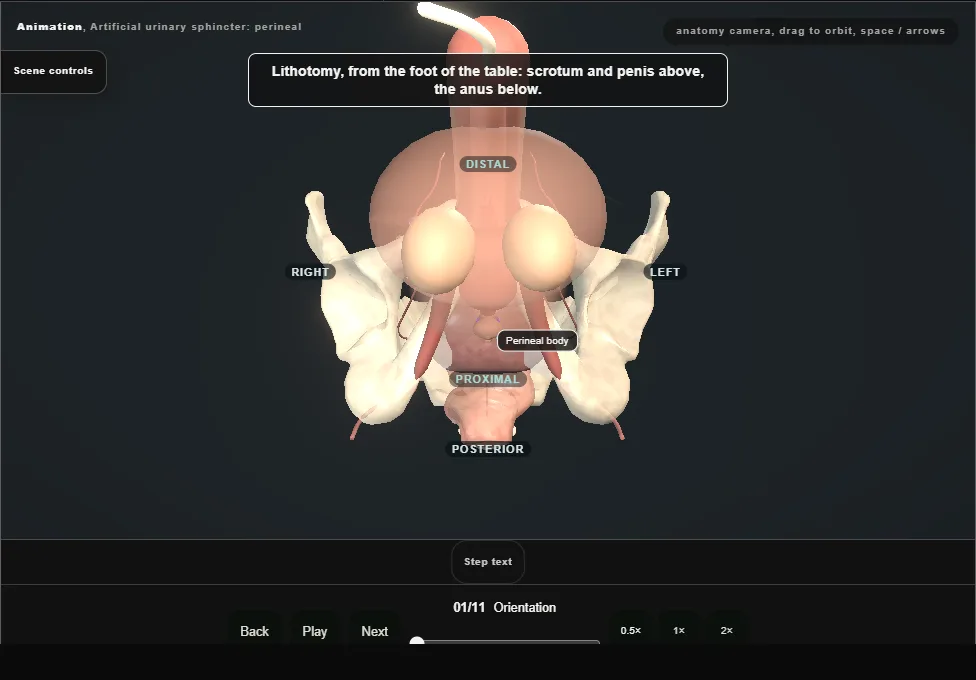
- Get your bearings first: the bulb lies under the pubic arch, the anus behind it, the scrotum in front.
- Before the knife: sterile urine, a urethra and bladder neck checked with cystoscopy, and a patient with the hands and understanding to work the pump.
- Lithotomy, a small catheter in the urethra, and strict infection discipline: antibiotics, alcohol-based skin preparation, minimal theatre traffic and no device touching skin.
- On the back table each component is filled with sterile saline, air out, and wetted in the surgeon's chosen solution; tubing is only ever held in rubber-shod clamps.
- 02
Perineal exposure
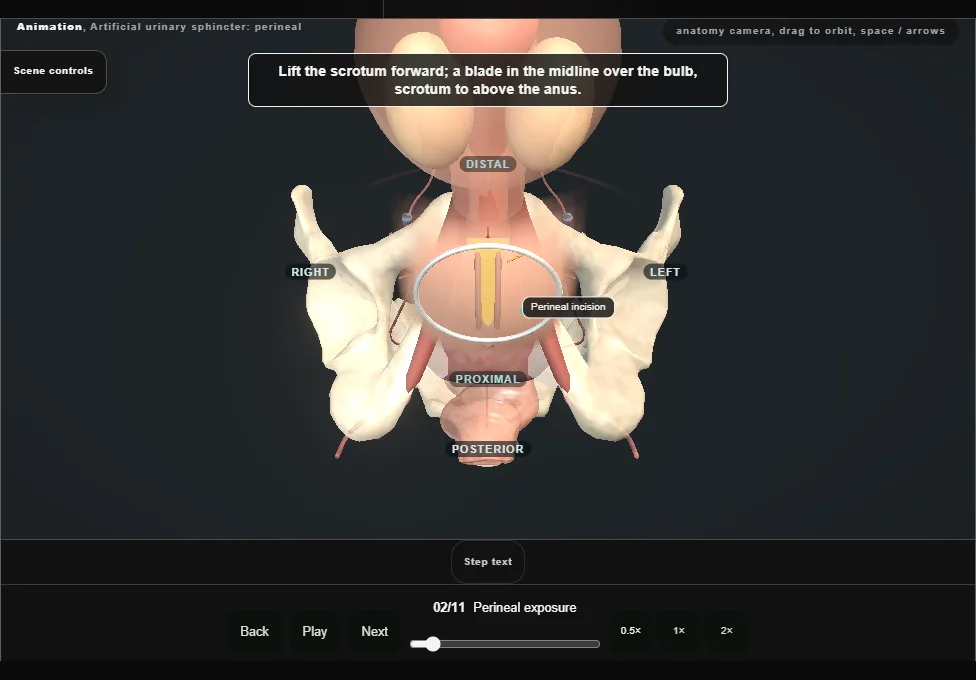
- A blade in the midline over the bulb, hooks on the skin edges, the fat parted, then bulbospongiosus split along its raphe with the diathermy to reach the bulb.
- A transverse scrotal approach reaches the urethra through one incision; the perineal route gives the more proximal cuff.
- 03
The plane on the bulb
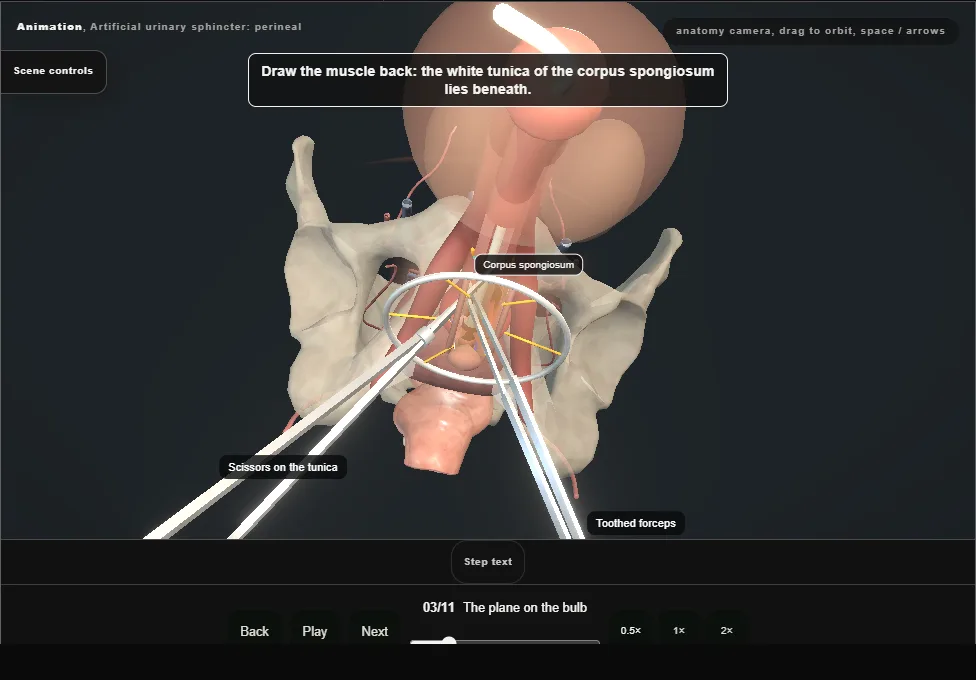
- This is the plane you are trying to develop: on the white tunica of the spongiosum, with the crura either side.
- The dorsal plane, between spongiosum and corpora, is where the urethra is at risk of injury during this dissection; the catheter inside is your guide.
- 04
Circumferential mobilisation
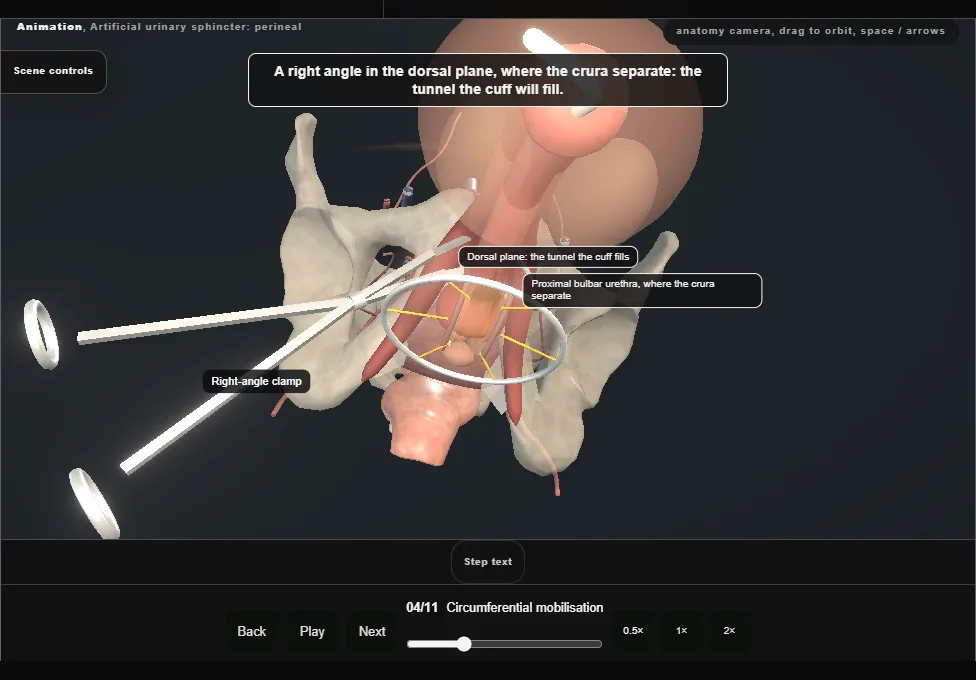
- A right angle in the dorsal plane frees the proximal bulbar urethra all round where the crura separate; a loop follows it through.
- Release no more than the cuff needs.
- A urethral injury here means no cuff today: repair it, catheterise, and implant another day.
- 05
Sizing
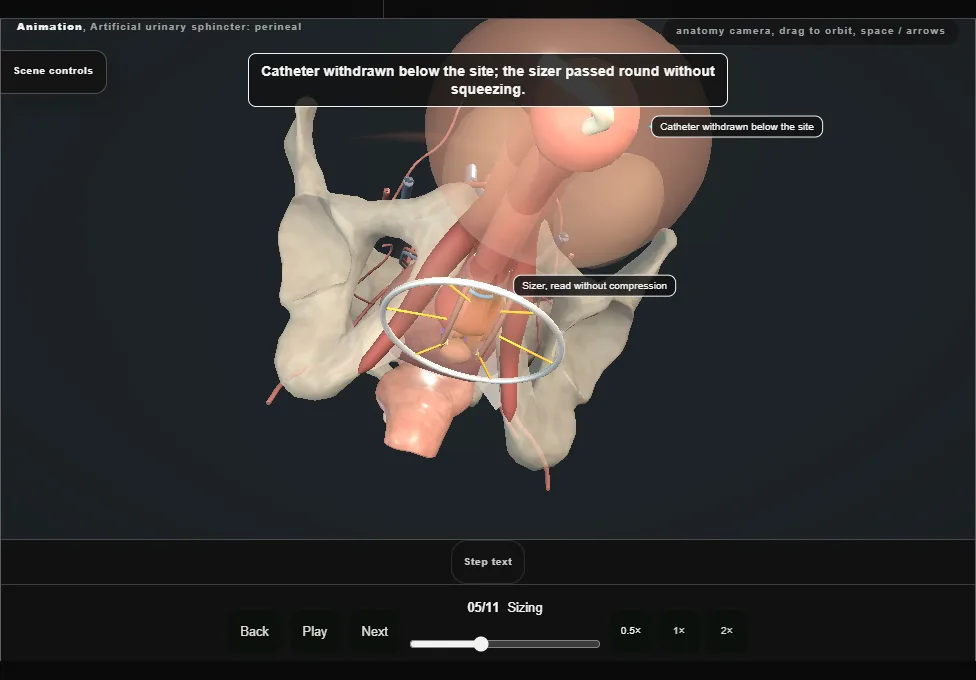
- Catheter withdrawn below the site, then the sizer round without compressing; the measured circumference chooses the cuff.
- 06
Place the cuff
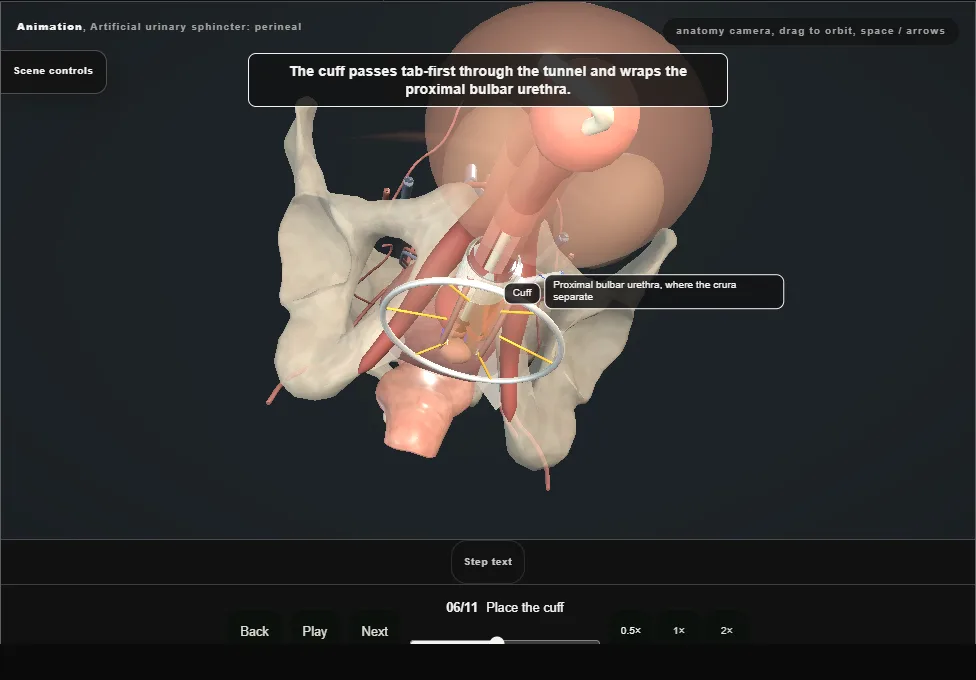
- The cuff passes tab-first through the tunnel and wraps the proximal bulbar urethra, tab locked, its tubing leaving laterally toward the pump; the catheter goes back in.
- 07
Pressure-regulating balloon
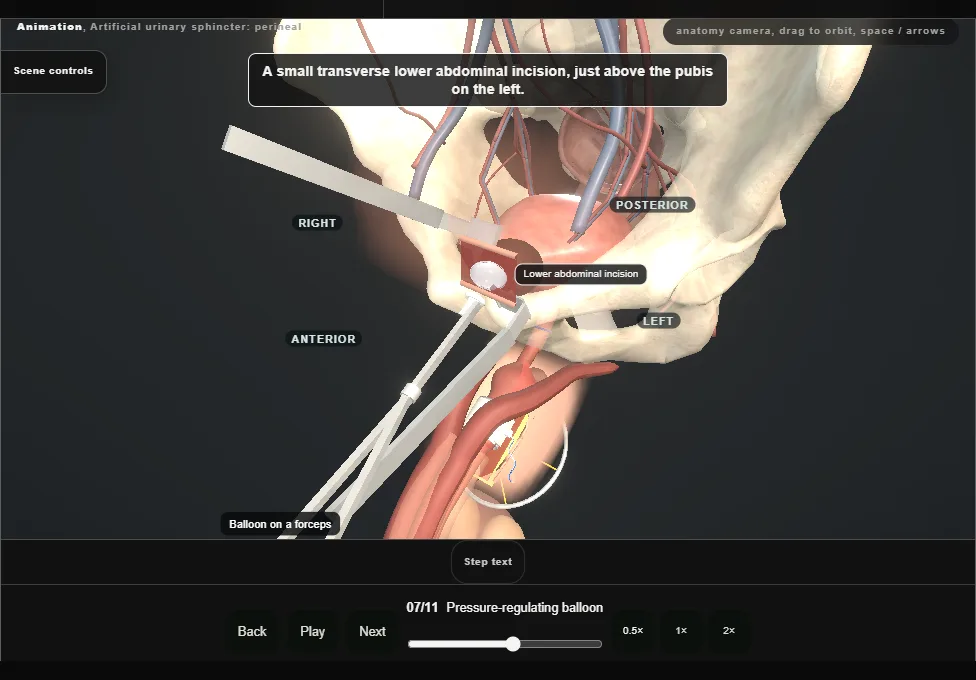
- Through a small transverse lower abdominal incision the muscle is held apart, a pocket made in the prevesical space, and the balloon carried in collapsed and filled with saline;
- a 60-69 cmH2O balloon is the usual choice (owner decision).
- A scarred or irradiated prevesical space is avoided: the balloon can sit high behind the abdominal muscles instead.
- The fascia is closed round the tubing where it leaves.
- 08
Control pump
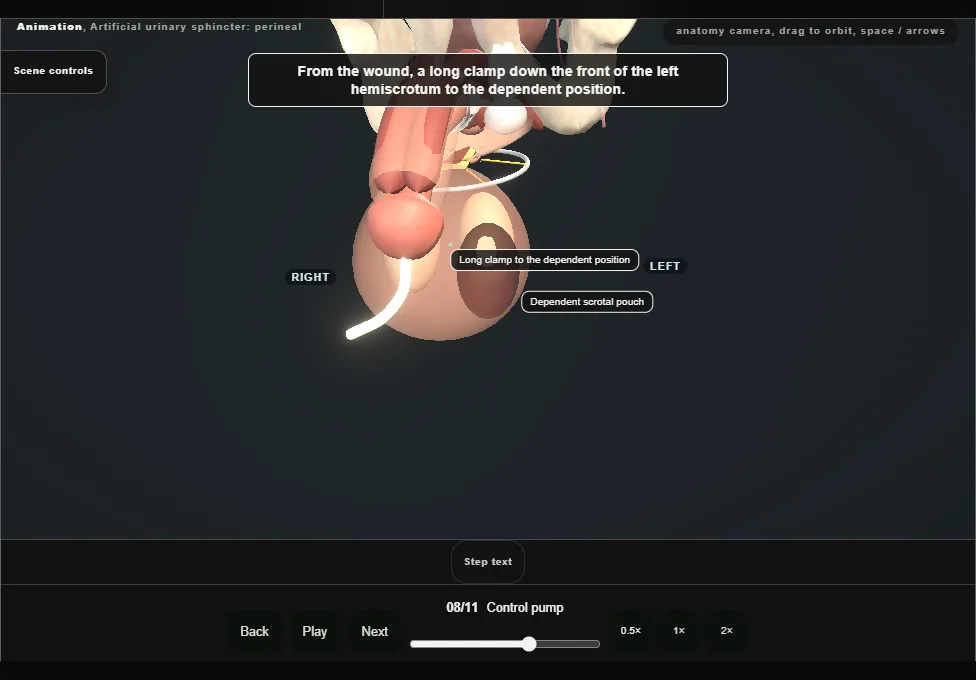
- A long clamp from the wound opens a dependent scrotal pouch in front of the left testis; the pump follows it down and sits with the deactivation button forward, where the patient can find it easily.
- 09
Tunnel and connect
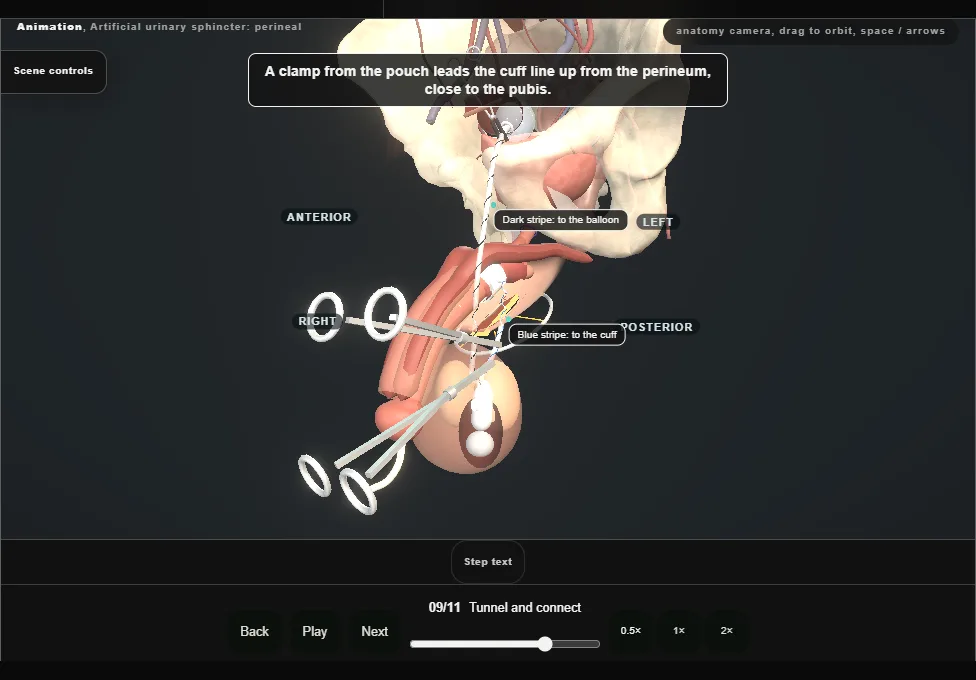
- A clamp leads each line to the pump close to the pubis;
- cut to length, the excess out, the ends flushed clear of air and debris, then joined with sutureless connectors and the clamps taken off: no tension, no redundant loops.
- 10
System check
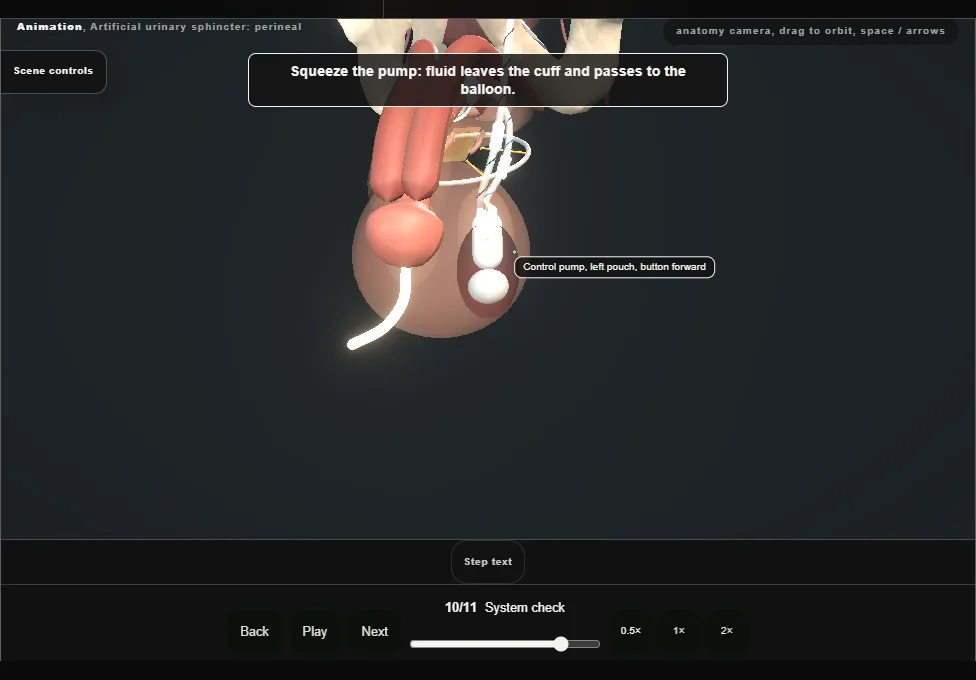
- Squeeze the pump and watch the cuff open, fluid pass to the balloon, and the cuff refill and close over two to three minutes.
- Then cycle it open and press deactivation: only with the cuff open and the device off does the catheter come out and a flexible scope go up to the cuff segment to confirm the mucosa is intact.
- The scope is withdrawn below the cuff before the button is released, and the lumen is seen to coapt as the cuff refills.
- 11
Deactivate and close
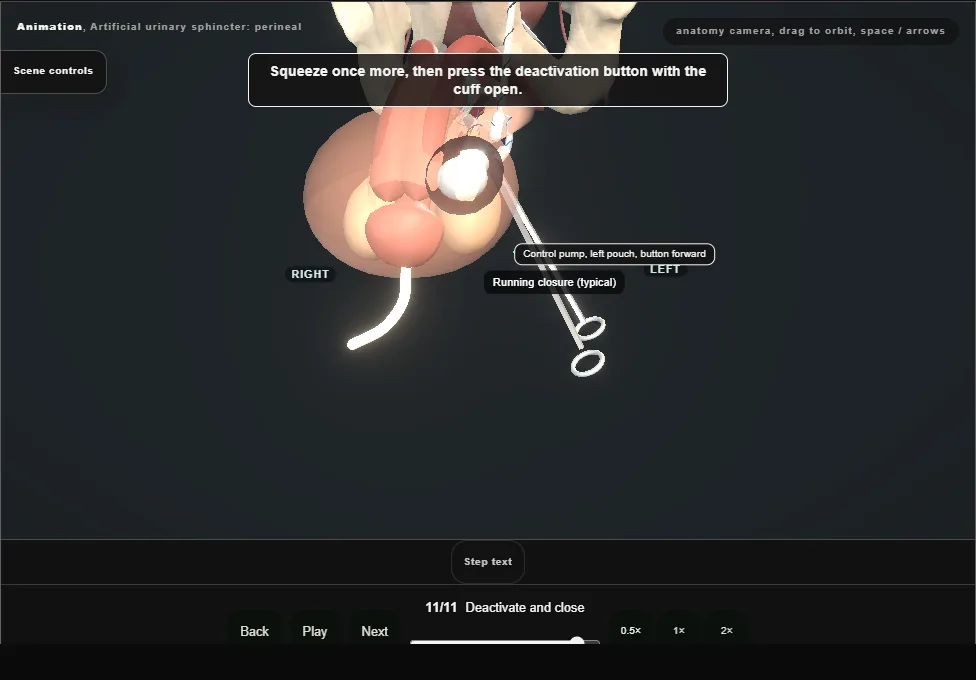
- Deactivate with the cuff open so the urethra heals unloaded; hooks off, bulbospongiosus closed over the cuff, then skin, then the abdominal wound.
- A small catheter comes out the next day.
- The IFU keeps the device deactivated for four to six weeks; activation follows in clinic by local protocol.
- Any future catheter or cystoscopy only with the cuff deflated and the device deactivated: the patient carries a device card.
Derived from pelvis/AusScene.tsx at build time: every step title and caption above is the authored
ProcedureDef text, reproduced verbatim, and this page shares its readable-points renderer with the animation
itself. 11 of 11 steps have a captured frame.
Text fingerprint 27f8b74391bd1ea2. A caption edit without a re-capture fails the production
check, so the sheet and the animation cannot drift apart silently.