
Revision sheet
Inguinal lymph node dissection
9 steps, each one the authored title and caption from the interactive animation, with the frame captured from that step. Read it before the case, or print it and work through the steps in order.
Teaching only, not for diagnosis or treatment decisions. The text on this sheet is the animation's own step copy, reproduced verbatim.
UrOops3D · UroRef · © Nity G
- 01
Mark the template
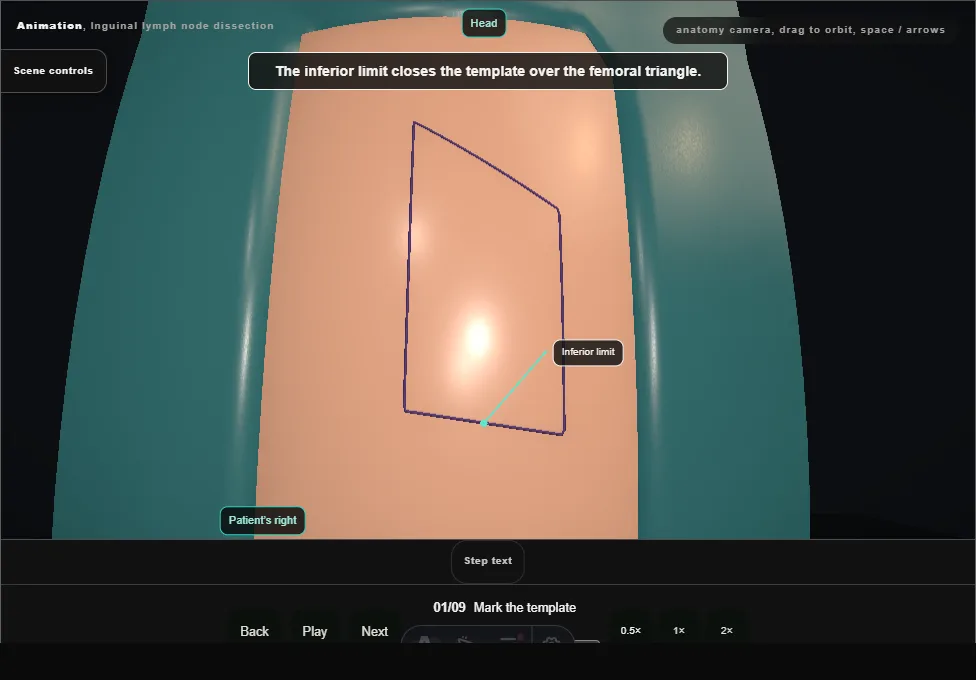
- Supine, hips abducted and turned out, knees flexed.
- The upper limit runs from the anterior superior iliac spine to the pubic tubercle; it is carried down the thigh medially and laterally and the lower ends are joined.
- 02
Incision below the ligament
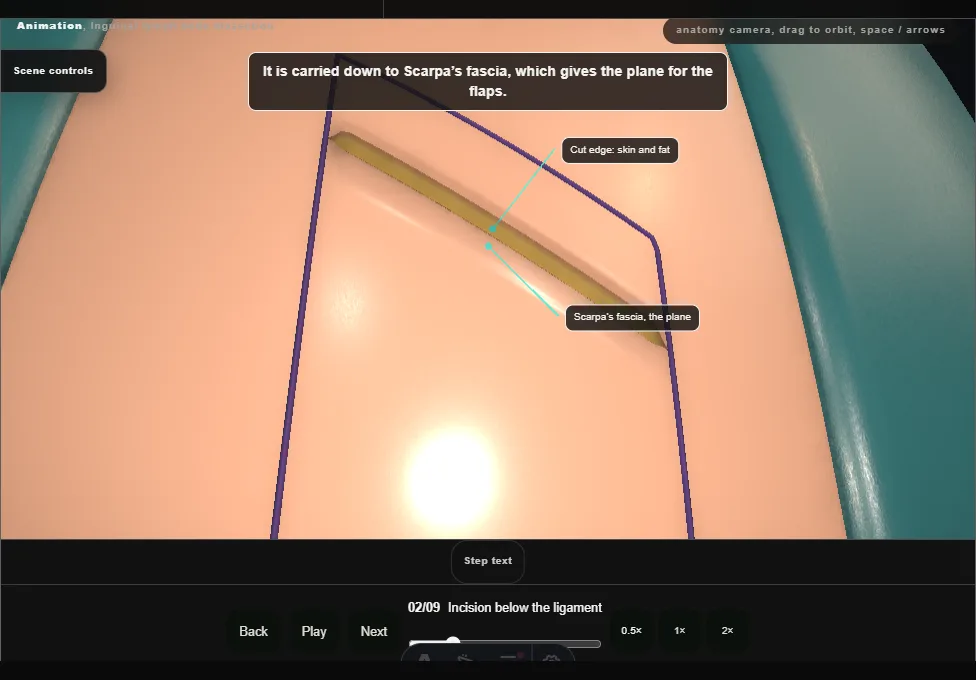
- The skin of the medial thigh is incised a short distance below the inguinal ligament, parallel to it, and the incision is carried down to Scarpa’s fascia.
- 03
Raise the flaps
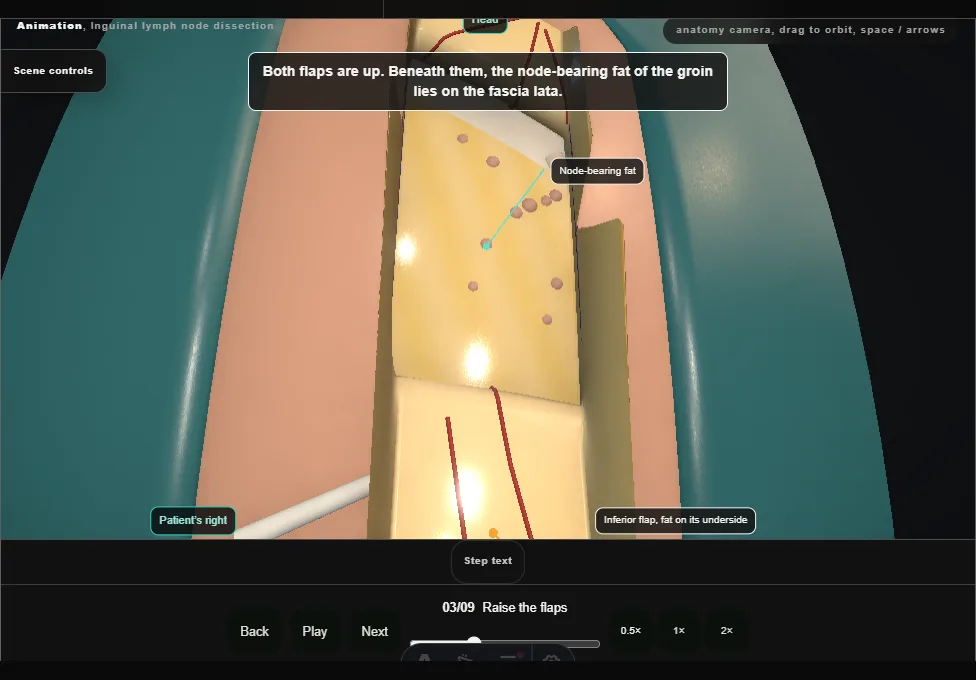
- Superior and inferior flaps are raised in the plane at Scarpa’s fascia to the marked limits.
- The fat and its vessels stay on the flap: a thin flap loses its blood supply.
- 04
Open the fascia lata
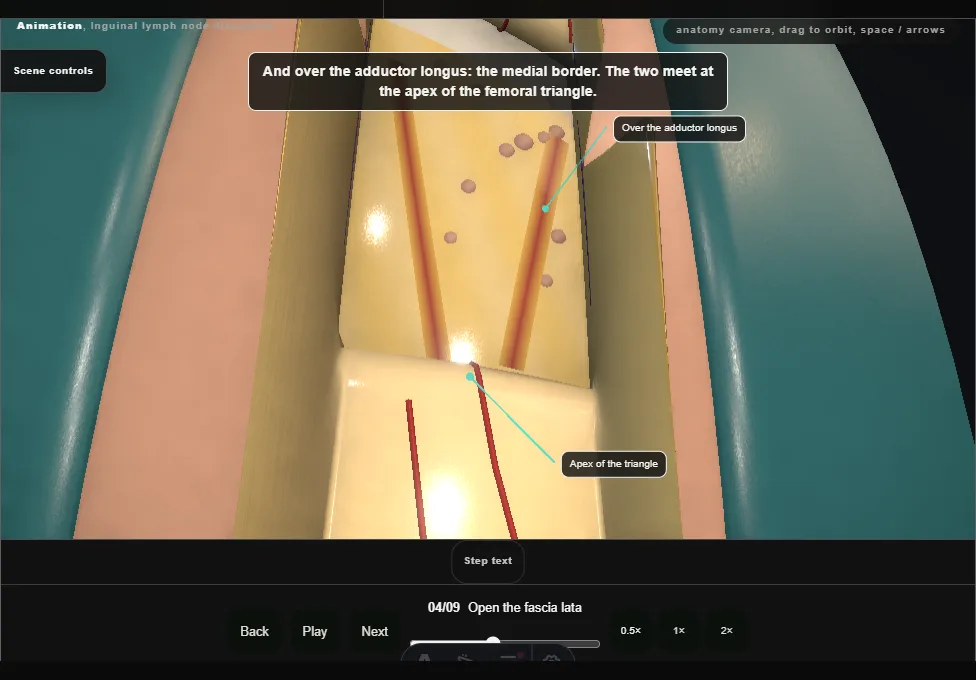
- The superficial nodes lie in five zones round the saphenofemoral junction.
- The fascia lata is incised over the sartorius laterally and the adductor longus medially, the borders of the deep dissection.
- 05
Free the packet from below
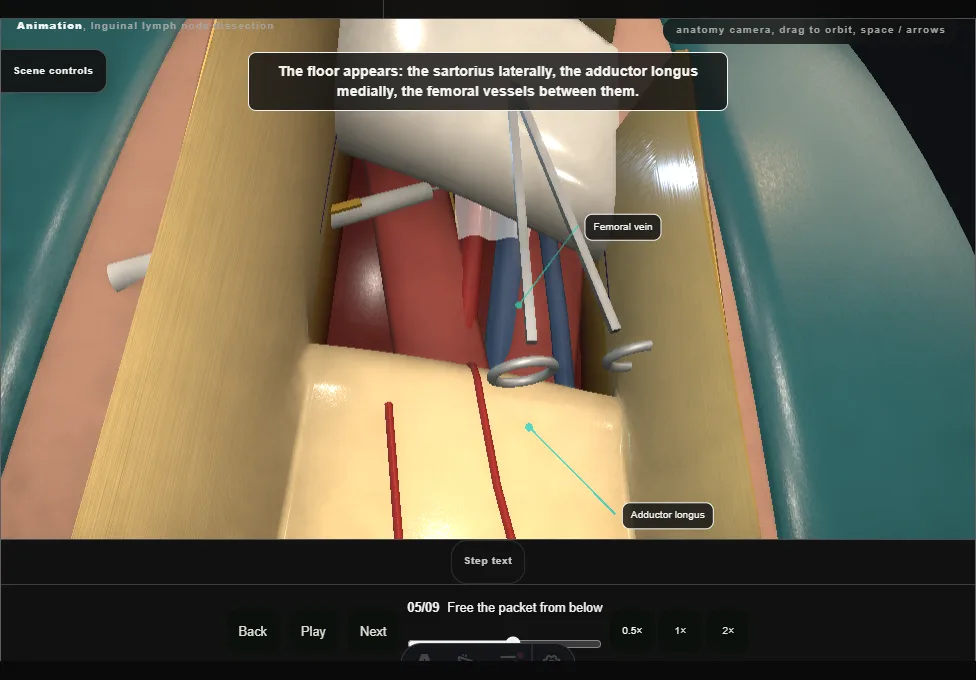
- The dissection begins inferiorly.
- The packet’s lower end is freed, divided between clips and lifted off its deep margin, and the dissection runs upward over the floor of the triangle.
- 06
Keep the saphenous vein
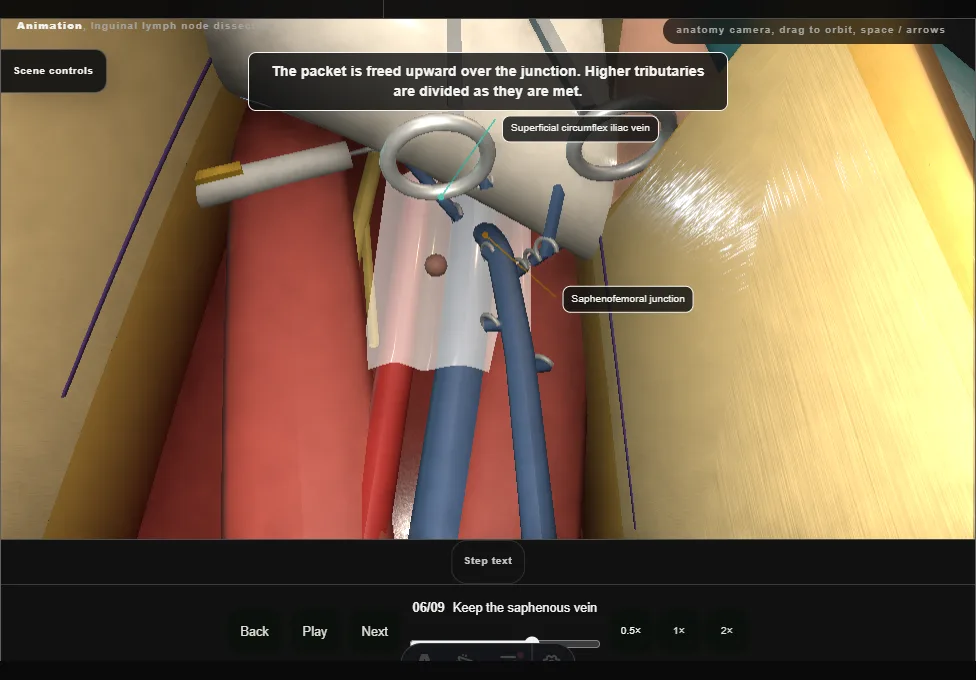
- The great saphenous vein is identified medially and preserved.
- Its tributaries into the packet are clipped and divided, and the packet is freed up over the junction.
- 07
Deep nodes and Cloquet
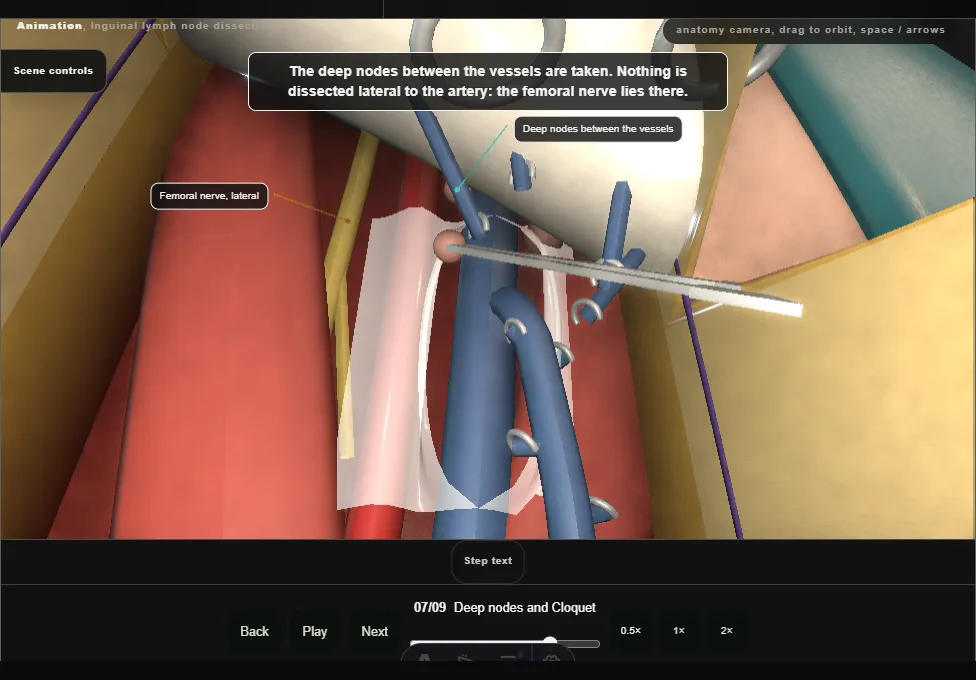
- The femoral sheath is incised at the fossa ovalis.
- The node of Cloquet and the deep nodes between the vessels are taken; the sheath is not opened laterally, where the femoral nerve lies.
- The packet comes out en bloc.
- 08
Transpose the sartorius
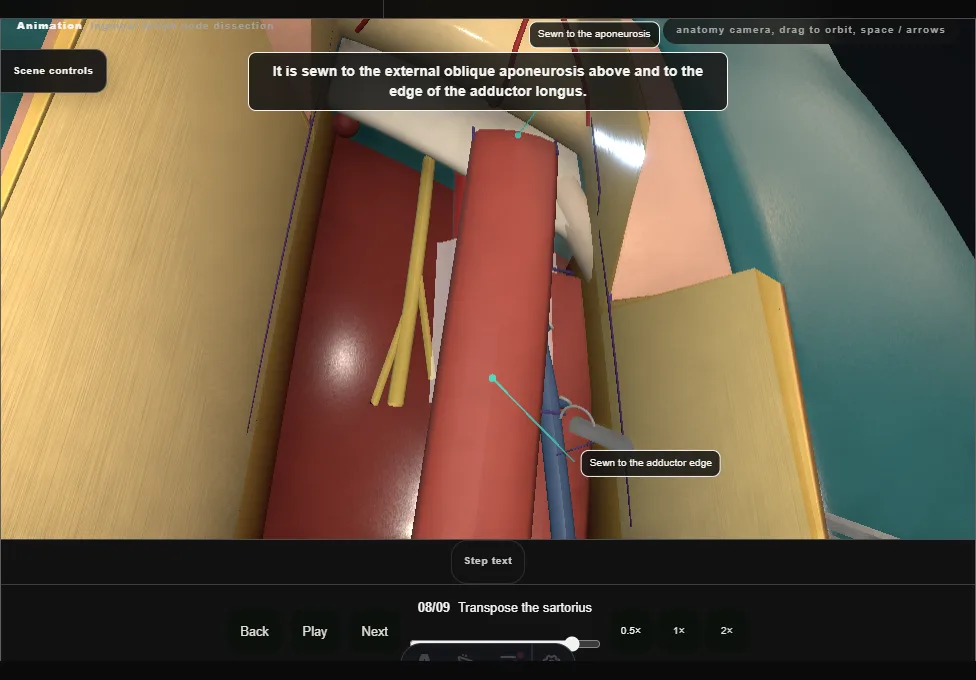
- After haemostasis and lymphostasis, the sartorius is divided at its origin and turned medially over the femoral vessels, then sewn to the aponeurosis and the adductor edge.
- Its medial side is left alone.
- 09
Drain, check the flaps, close
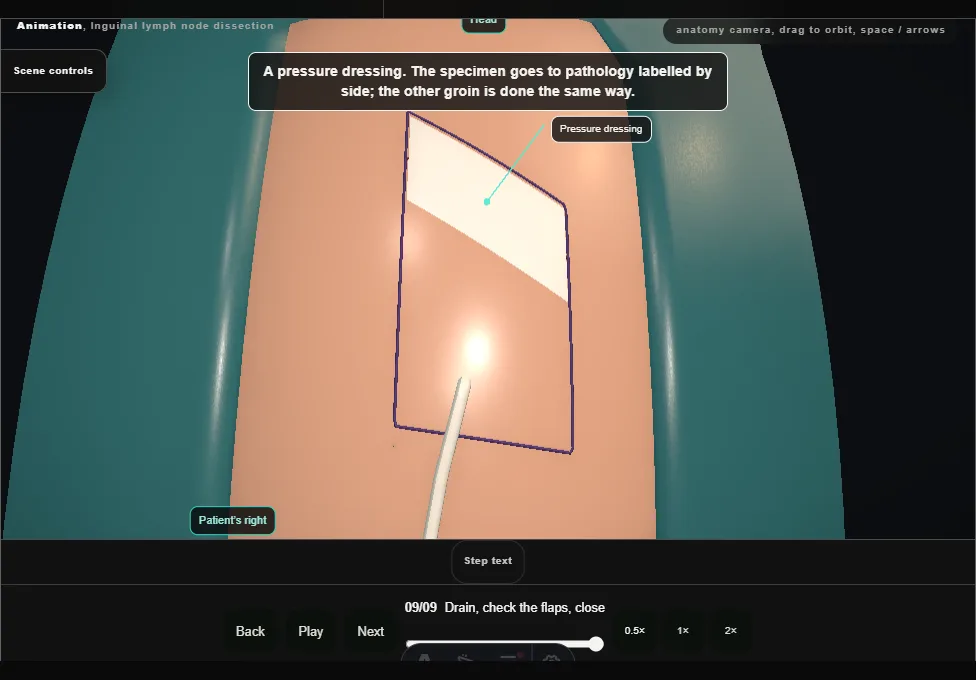
- A drain under the flap leaves through a separate stab.
- The flaps are checked for viability before Scarpa’s fascia and the skin are closed and a pressure dressing goes on.
Derived from groin/InguinalNodeDissectionScene.tsx at build time: every step title and caption above is the authored
ProcedureDef text, reproduced verbatim, and this page shares its readable-points renderer with the animation
itself. 9 of 9 steps have a captured frame.
Text fingerprint d59cf27aa6ea35f5. A caption edit without a re-capture fails the production
check, so the sheet and the animation cannot drift apart silently.