
Revision sheet
Megaureter repair: reimplantation with excisional tapering
9 steps, each one the authored title and caption from the interactive animation, with the frame captured from that step. Read it before the case, or print it and work through the steps in order.
Teaching only, not for diagnosis or treatment decisions. The text on this sheet is the animation's own step copy, reproduced verbatim.
UrOops3D · UroRef · © Nity G
- 01
Open the bladder
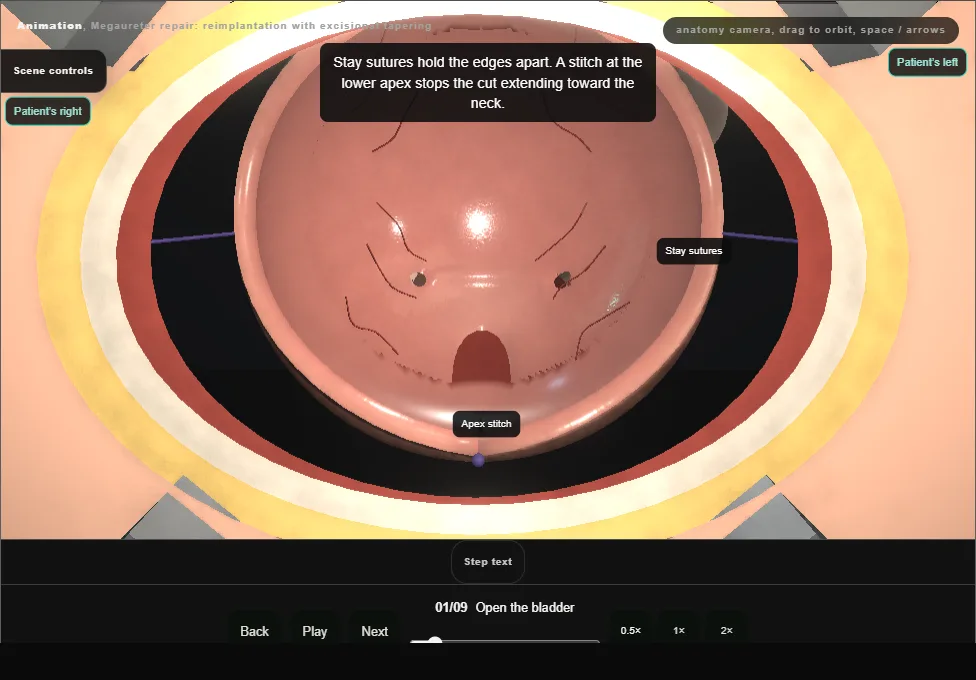
- The bladder is filled through a urethral catheter.
- A small transverse incision above the pubis, the rectus sheath opened in an arc, the recti parted in the midline and the peritoneum swept up.
- Allis forceps lift the anterior wall and it is opened by a vertical midline cystotomy; stay sutures hold the edges and a stitch at the lower apex stops the cut extending toward the neck.
- A ring retractor with padded blades shows both orifices.
- 02
Free the intramural ureter
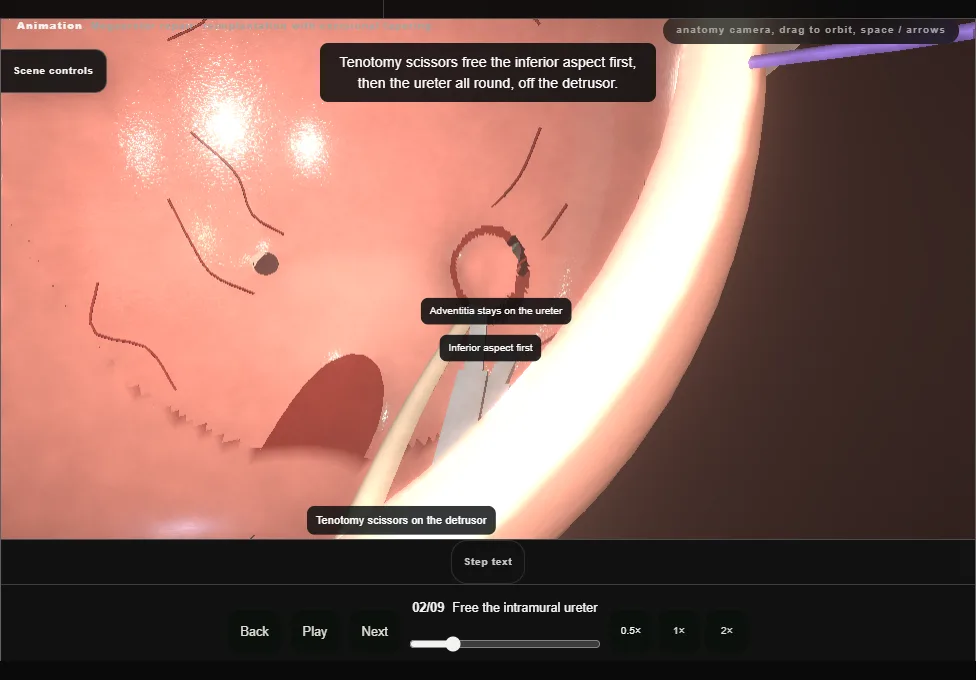
- A fine feeding tube is passed up the left ureter and secured to the ureteric wall with a stitch.
- Gentle traction on the tube lifts the orifice, which is circumscribed.
- Tenotomy scissors free the inferior aspect first and then the whole circumference from the detrusor, and a pledget sweeps the peritoneum off the back of the bladder wall.
- The adventitia stays on the ureter throughout.
- 03
Mobilise outside the bladder
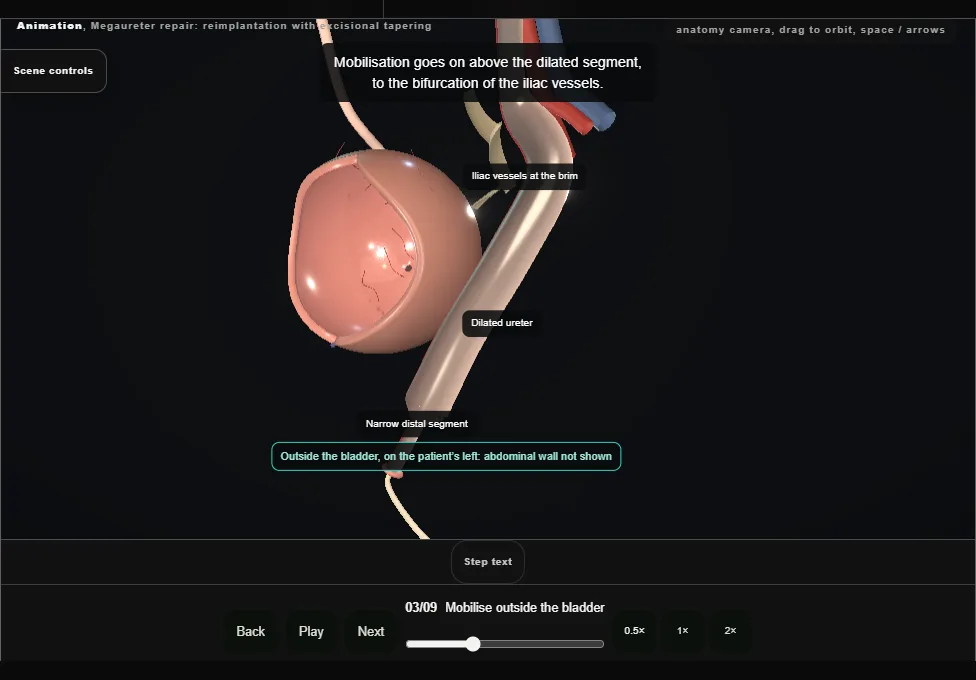
- The freed ureter is passed out through the bladder wall and the dissection continues outside the bladder.
- The ureter is freed from the peritoneum with the periureteric tissue and its blood supply left on it, and mobilised to above the dilated segment, at the level of the iliac bifurcation.
- 04
Examine and prepare
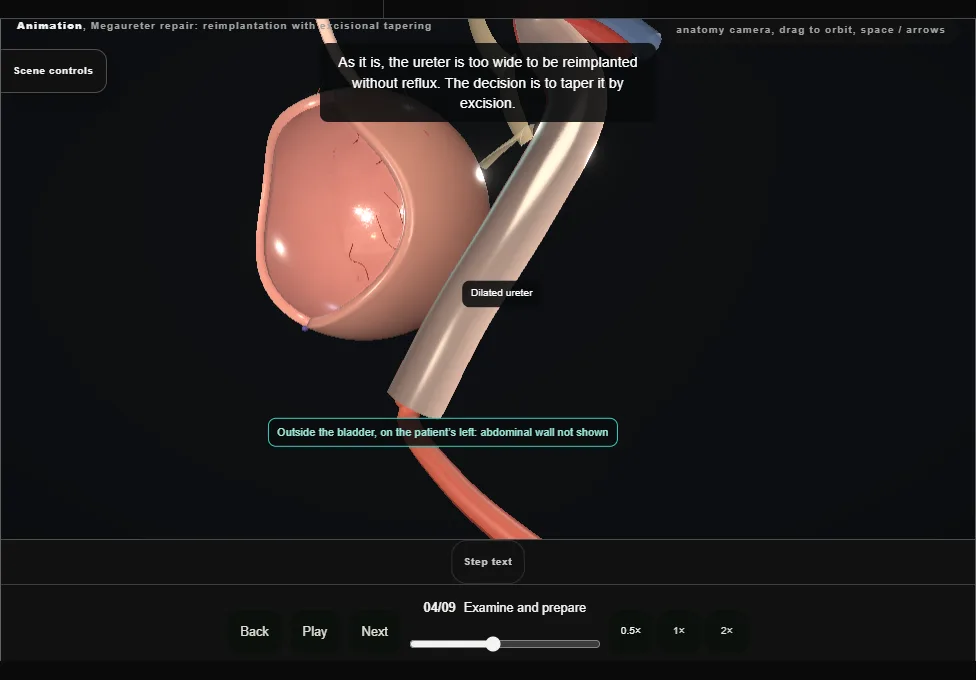
- The ureter and its blood supply are examined: the longitudinal vessels on the medial side are seen and kept.
- The narrow distal segment is divided and removed, and the feeding tube is replaced by a larger soft catheter passed up to the renal pelvis.
- The dilated ureter is too wide to be reimplanted without reflux, so it is tapered by excision.
- 05
Excise the lateral strip
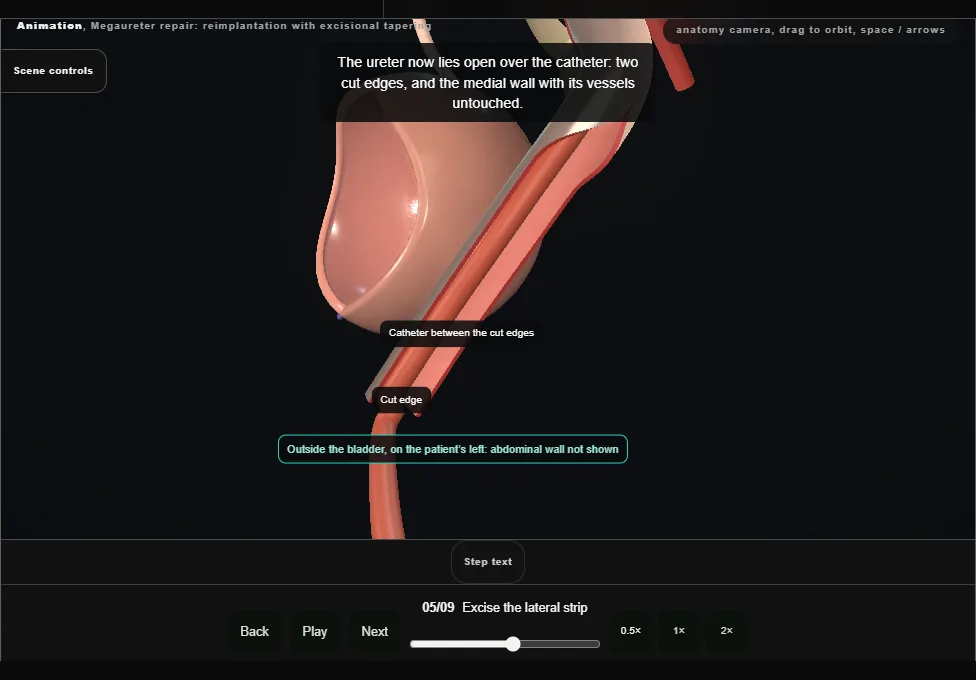
- Small Babcock forceps take the lateral wall of the dilated ureter, and the redundant wall is excised sharply as one strip, which goes for histology.
- The medial wall and its vessels are not touched.
- The catheter in the lumen sets how much wall is left.
- 06
Close the taper
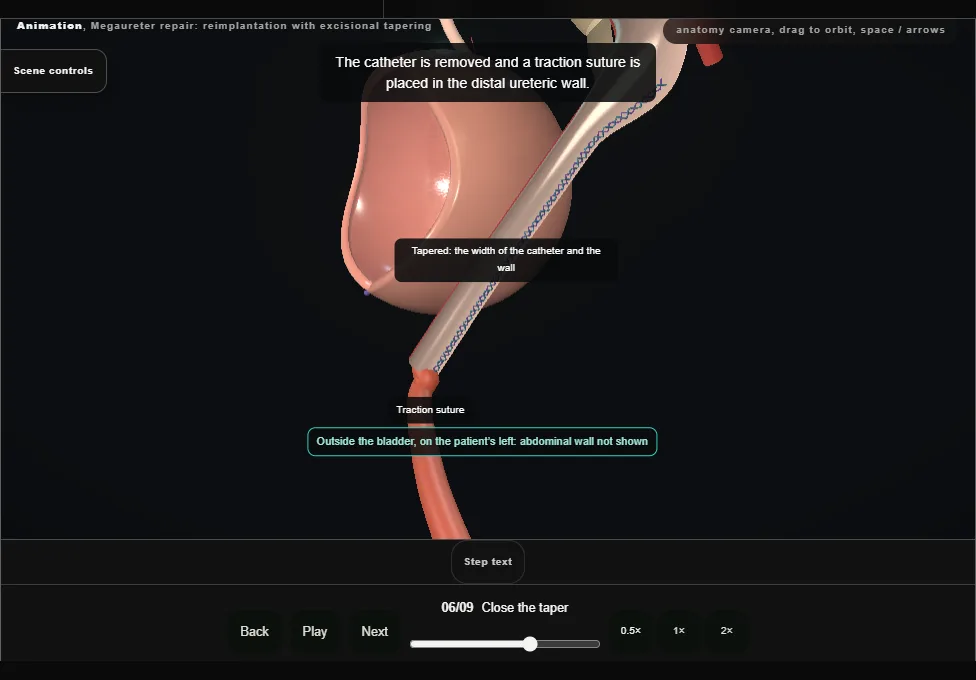
- The wall is closed over the catheter in two layers: a running locking suture through mucosa and muscle, then a running suture through muscle and adventitia.
- The catheter is removed and a traction suture is placed in the distal wall.
- The ureter is checked for peristalsis, injury and bleeding.
- 07
Tunnel and draw through
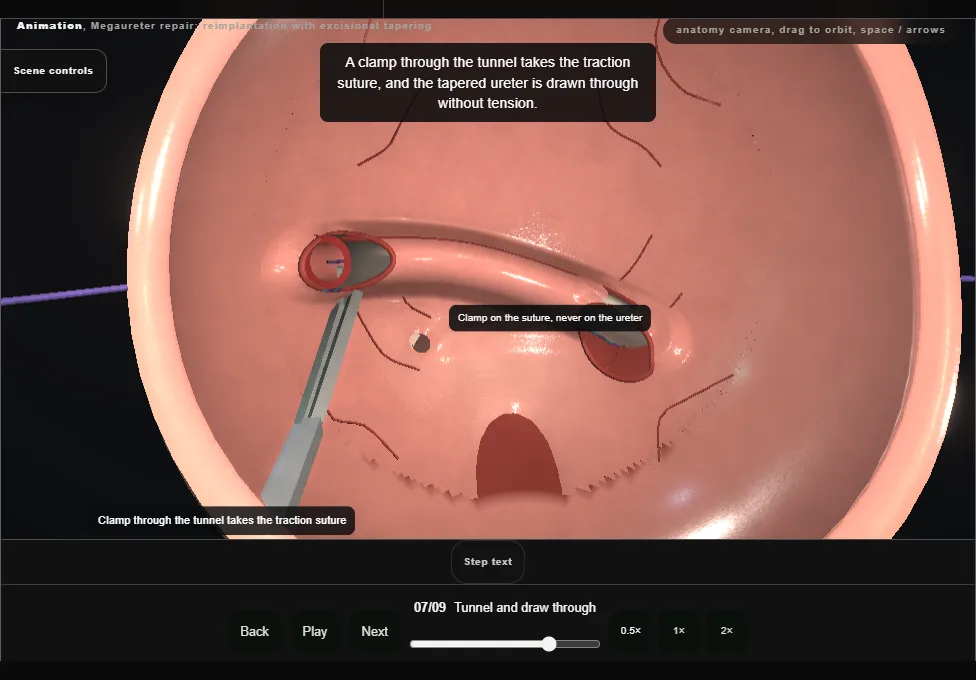
- The mucosa above and lateral to the opposite orifice is incised, and a submucosal tunnel is made by sharp and blunt dissection from the original orifice to that opening.
- Its length should be five times the width of the ureter.
- The tapered ureter is drawn through by its traction suture and must lie without tension, obstruction or kinking.
- The mucosal defect at the original orifice is closed over the ureter where it enters the tunnel.
- 08
Anastomose
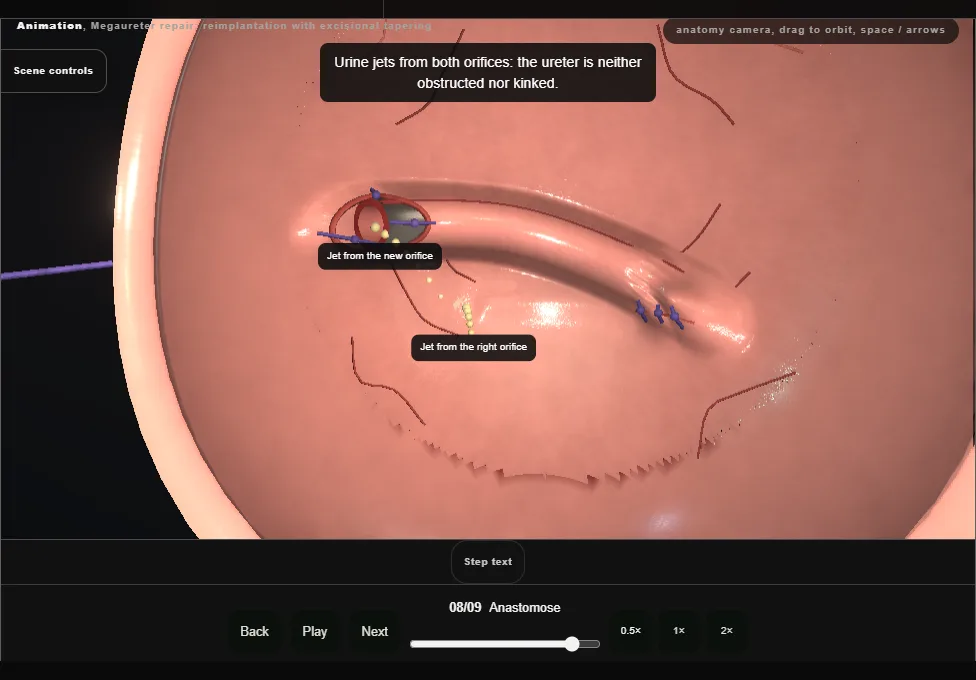
- The end is spatulated ventrally and its edges trimmed back to a good blood supply.
- Two dorsal sutures anchor the ureter to trigone muscle and bladder mucosa, and three more at nine, twelve and three o’clock complete the anastomosis.
- Jets of urine from both orifices show there is no obstruction.
- 09
Leave a tube and close
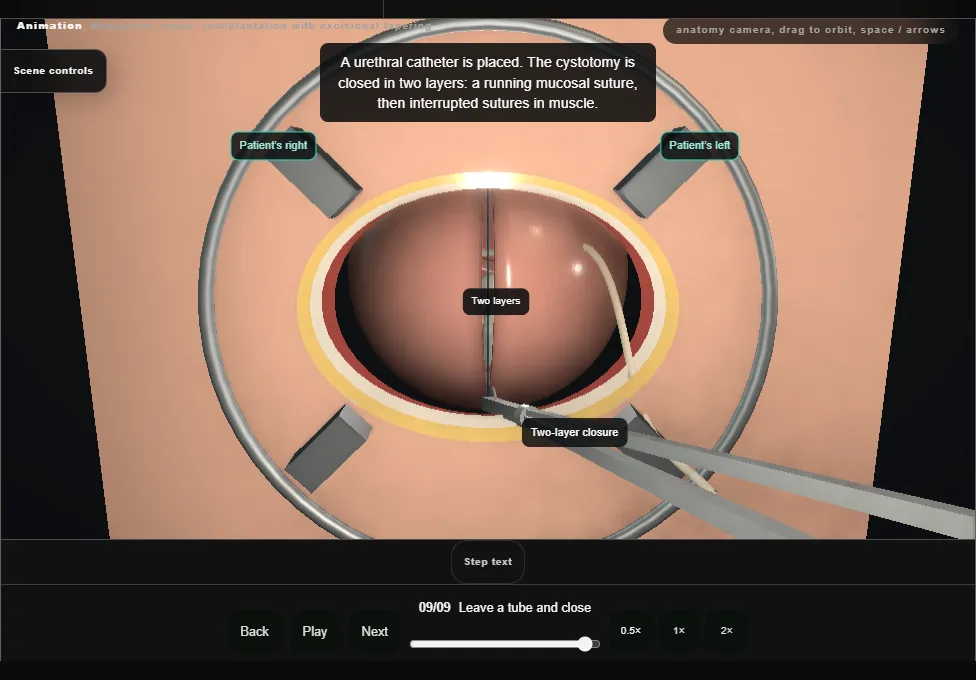
- A fine feeding tube is passed through the new orifice to the renal pelvis and stitched to the bladder mucosa.
- A urethral catheter is placed, and the cystotomy is closed in two layers and tested with irrigation.
- A drain lies in the retropubic space away from the cystotomy; drain and tube leave through a separate stab, and the wound is closed in layers.
Derived from paediatric/MegaureterScene.tsx at build time: every step title and caption above is the authored
ProcedureDef text, reproduced verbatim, and this page shares its readable-points renderer with the animation
itself. 9 of 9 steps have a captured frame.
Text fingerprint e85f5a742be5692f. A caption edit without a re-capture fails the production
check, so the sheet and the animation cannot drift apart silently.