
Revision sheet
Extravesical ureteric reimplantation (Lich-Gregoir), left
8 steps, each one the authored title and caption from the interactive animation, with the frame captured from that step. Read it before the case, or print it and work through the steps in order.
Teaching only, not for diagnosis or treatment decisions. The text on this sheet is the animation's own step copy, reproduced verbatim.
UrOops3D · UroRef · © Nity G
- 01
Fill the bladder and expose it
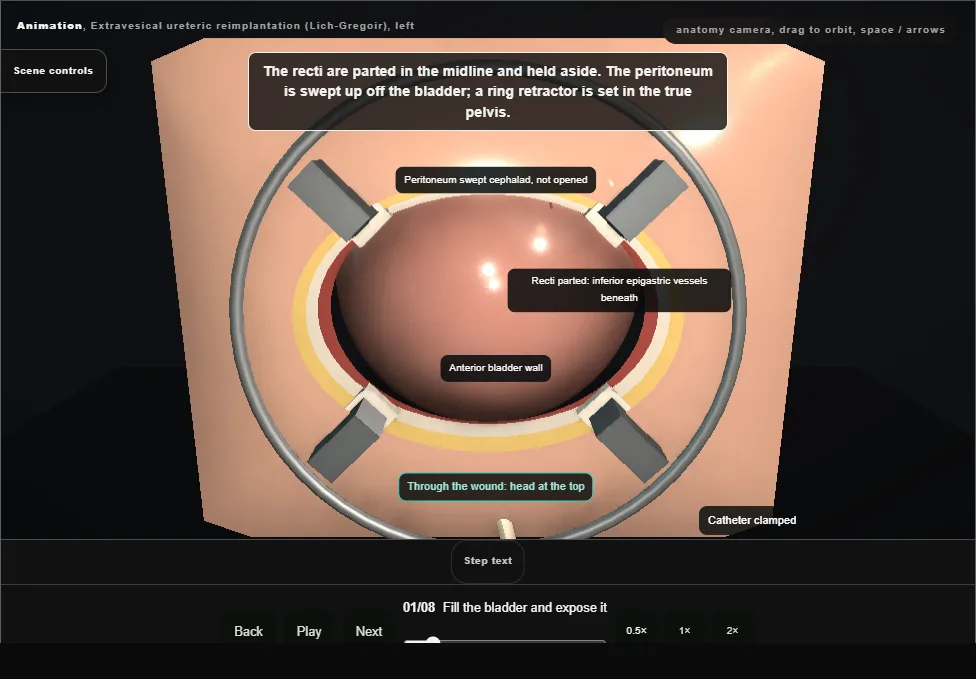
- Supine with the hips abducted.
- The bladder is partly filled through the catheter, which is clamped.
- A small curved transverse incision above the pubis is carried to the rectus sheath, which is opened in the same arc clear of the inguinal canals.
- The recti are parted in the midline and held aside, the peritoneum is swept up, and a ring retractor with moist swabs under its blades is set in the true pelvis.
- 02
The obliterated artery, then the ureter
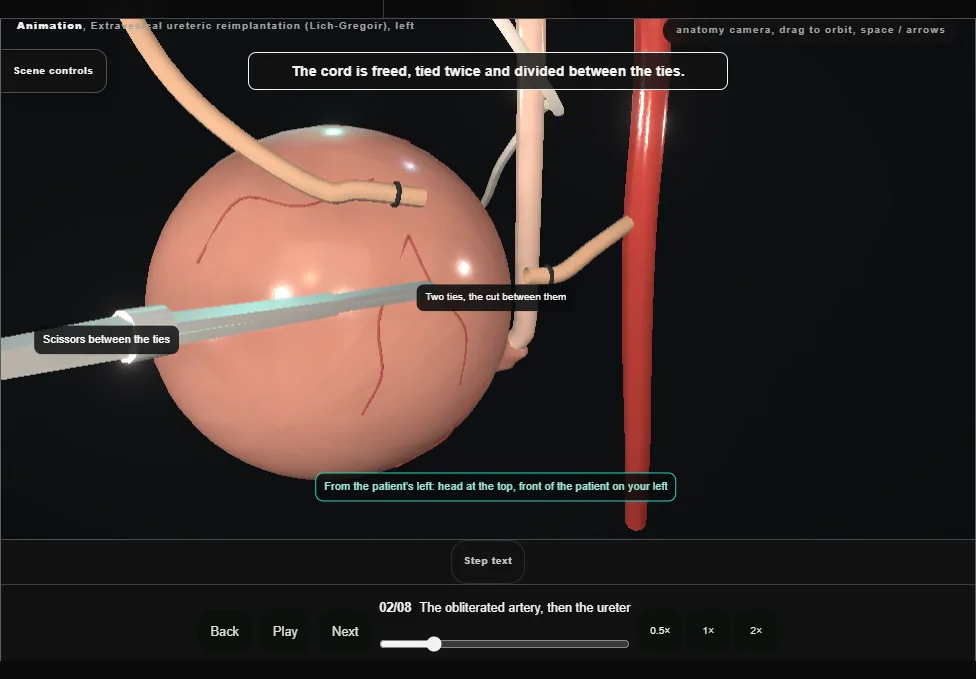
- Lateral to the bladder, against the pelvic side wall, lies the obliterated umbilical artery.
- It is freed, tied and divided.
- With the bladder drawn gently down and toward the midline, the ureter is found just medial to where that artery arises.
- The bladder is not opened at any point in this operation.
- 03
Mobilise the ureter to the junction
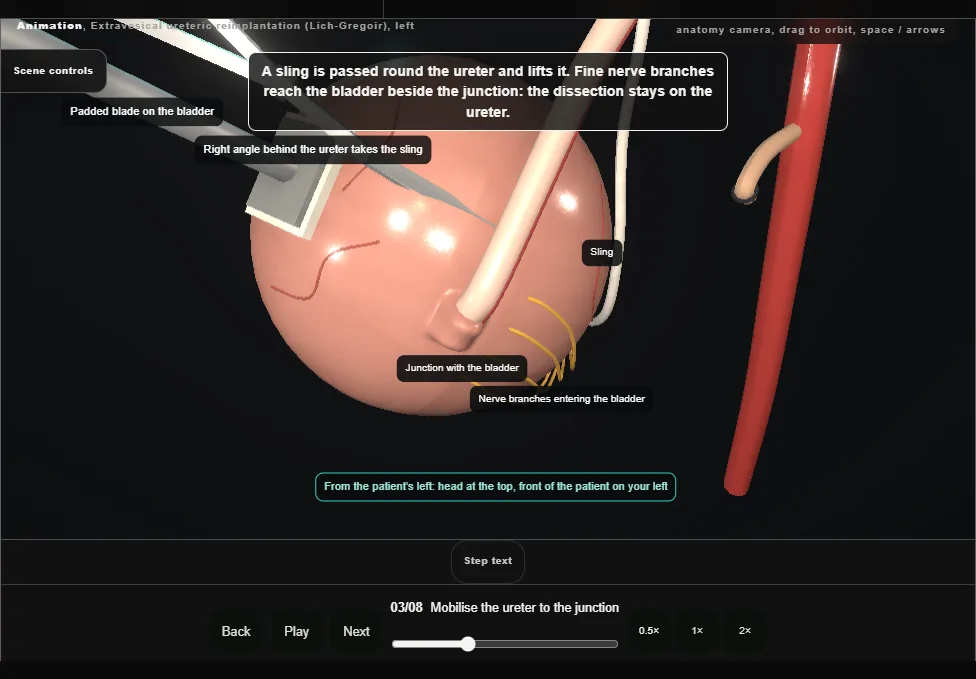
- The ureter is freed down to the bladder along its lateral side, the vessels on its medial side kept.
- Near the junction the dissection stays hard on the ureteric wall: the terminal nerve branches enter the bladder here.
- A sling lifts the ureter, and the intramural ureter is eased off the detrusor all round.
- 04
Incise the detrusor
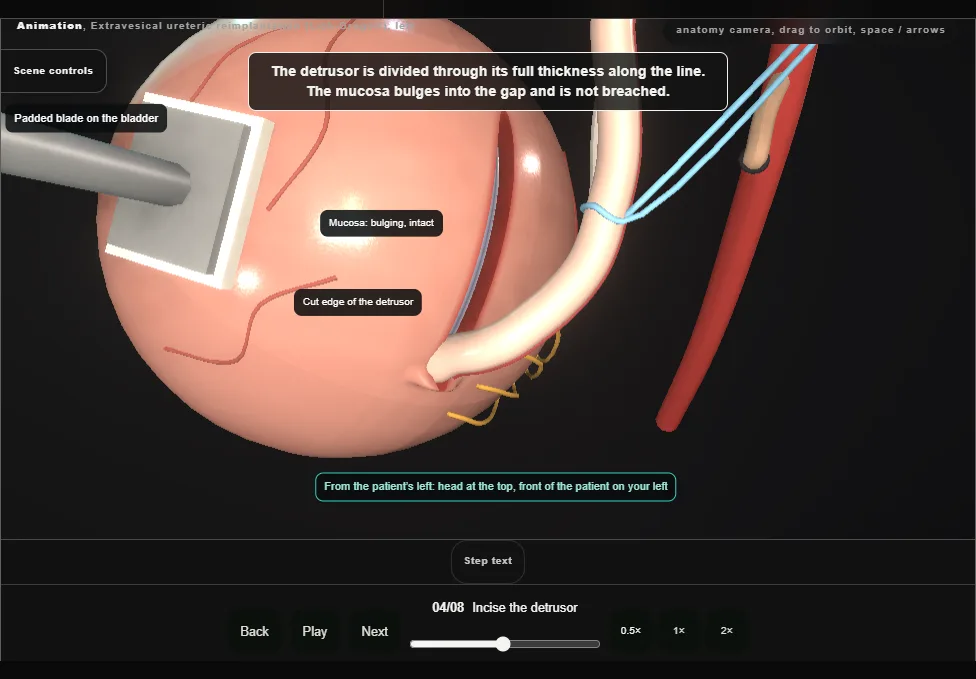
- The detrusor is incised through its full thickness from the junction cephalad, in the line of the ureter.
- The mucosa bulges into the gap and is not breached; the ureteric orifice is not disturbed.
- The tunnel this makes is five times as long as the ureter is wide.
- 05
Undermine the muscle edges
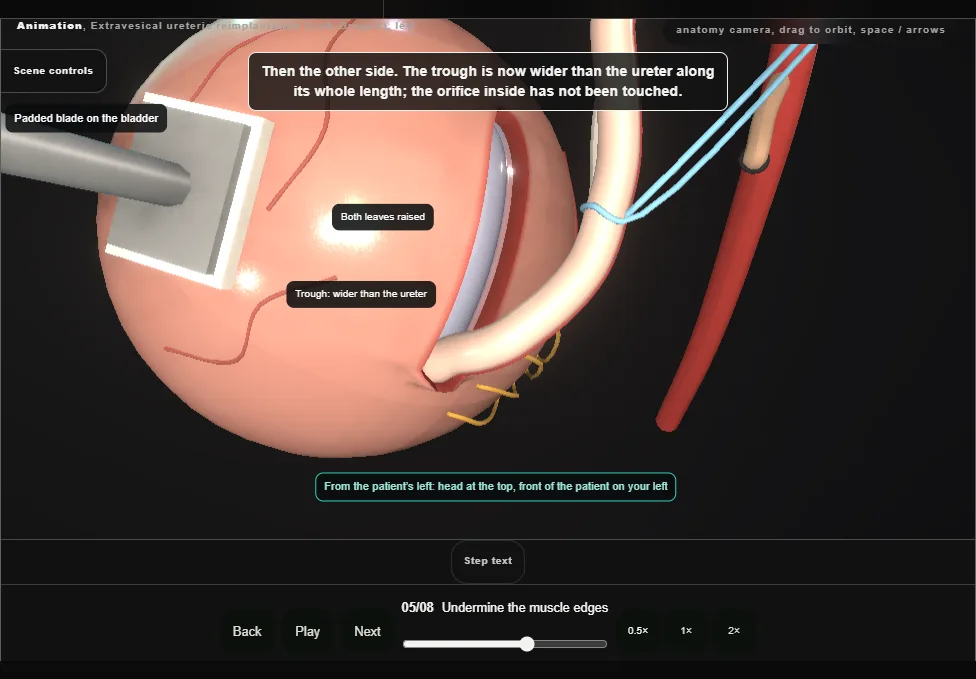
- The cut detrusor is undermined off the mucosa on each side, raising two leaves of muscle.
- The trough is wide enough to take the ureter along its whole length, with the mucosa whole in its floor.
- 06
Lay the ureter in and drain the bladder
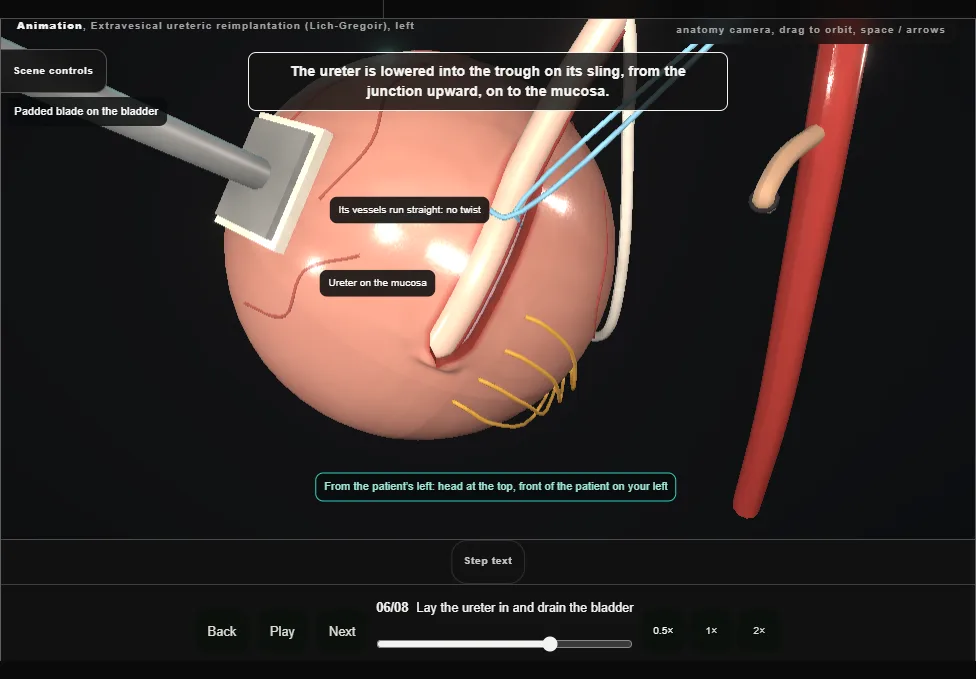
- The distal ureter is laid in the trough on the mucosa, its vessels running straight.
- Then the bladder is drained, so the wall slackens and the muscle will come together over the ureter without tension.
- 07
Close the detrusor over the ureter
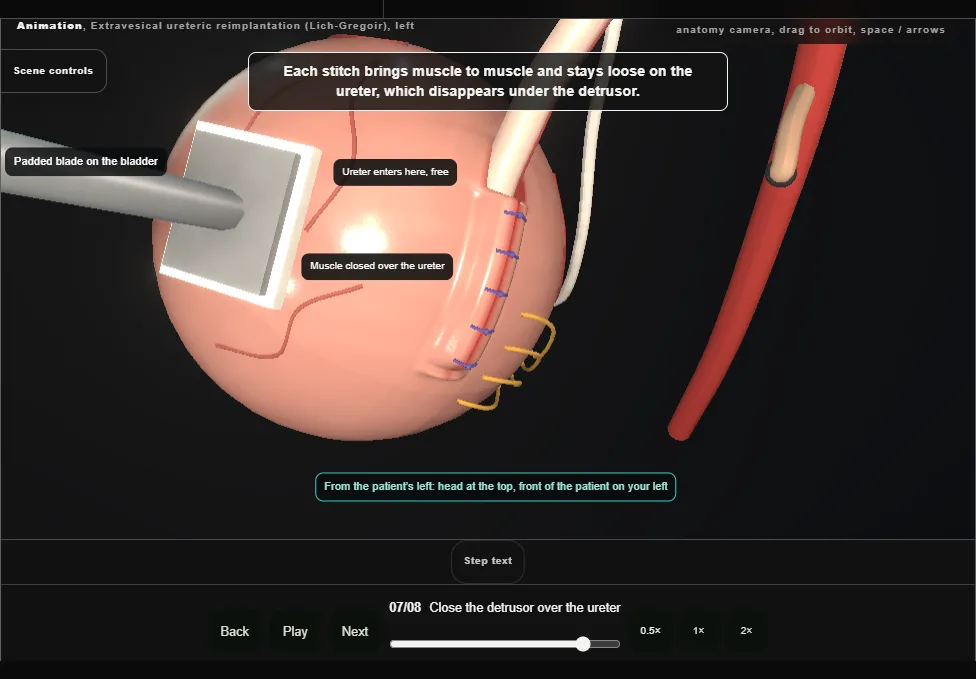
- The two leaves are approximated over the ureter with interrupted absorbable stitches, from the proximal end to the distal.
- The closure is loose: muscle meets muscle, the ureter is not gripped, and its entry at the cephalad end is left free.
- 08
Release, refill, inspect, close
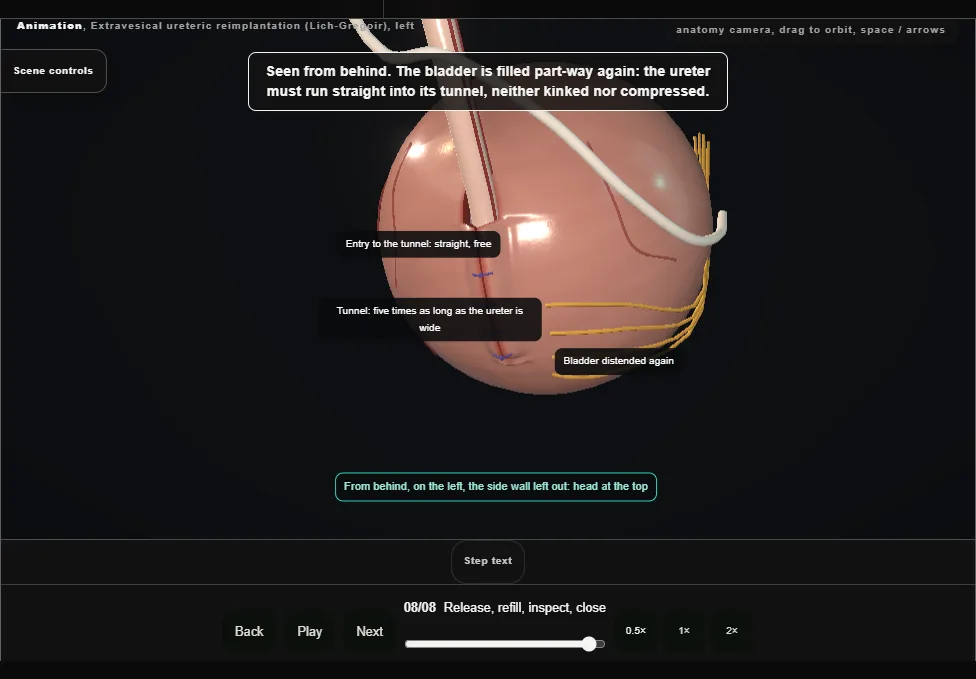
- The retraction is released and the bladder is distended again, part-way.
- The ureter is inspected: a straight course into the tunnel, no kink and no compression.
- Haemostasis is secured, the retractor is removed and the wound is closed in layers.
- The catheter is left on free drainage.
Derived from paediatric/ExtravesicalReimplantScene.tsx at build time: every step title and caption above is the authored
ProcedureDef text, reproduced verbatim, and this page shares its readable-points renderer with the animation
itself. 8 of 8 steps have a captured frame.
Text fingerprint 922c6e196365e4d9. A caption edit without a re-capture fails the production
check, so the sheet and the animation cannot drift apart silently.