
Revision sheet
Ureterocalicostomy
8 steps, each one the authored title and caption from the interactive animation, with the frame captured from that step. Read it before the case, or print it and work through the steps in order.
Teaching only, not for diagnosis or treatment decisions. The text on this sheet is the animation's own step copy, reproduced verbatim.
UrOops3D · UroRef · © Nity G
- 01
Expose the lower pole
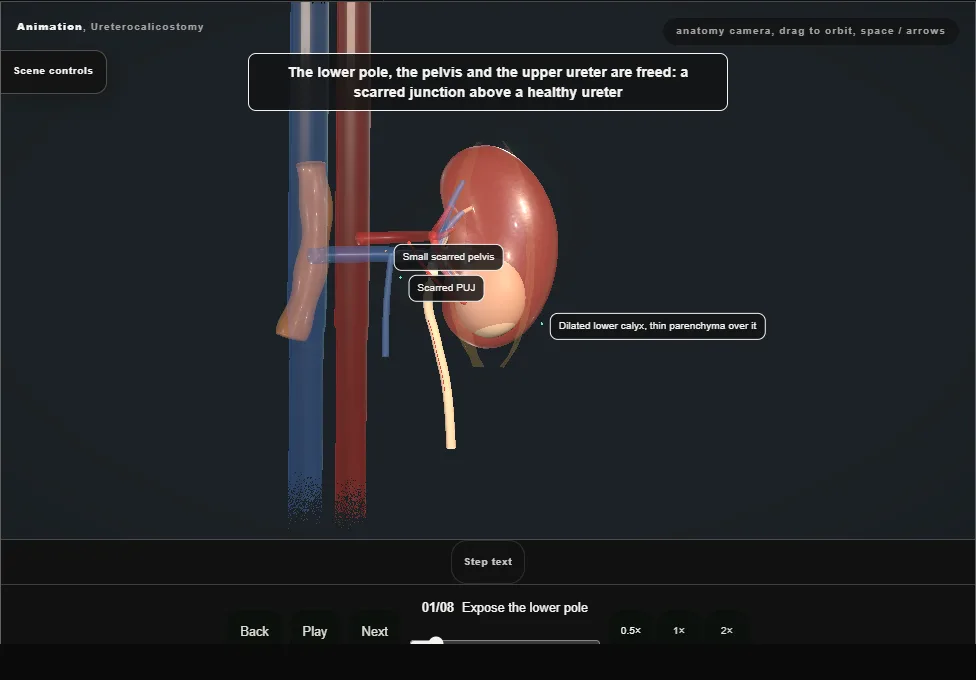
- Open flank approach, drawn as a cutaway from the front.
- The colon is reflected, Gerota's fascia opened and the lower pole, the pelvis and the upper ureter freed.
- The pelvis is small, intrarenal and scarred; the lower calyx is dilated under thin parenchyma.
- 02
Divide the ureter
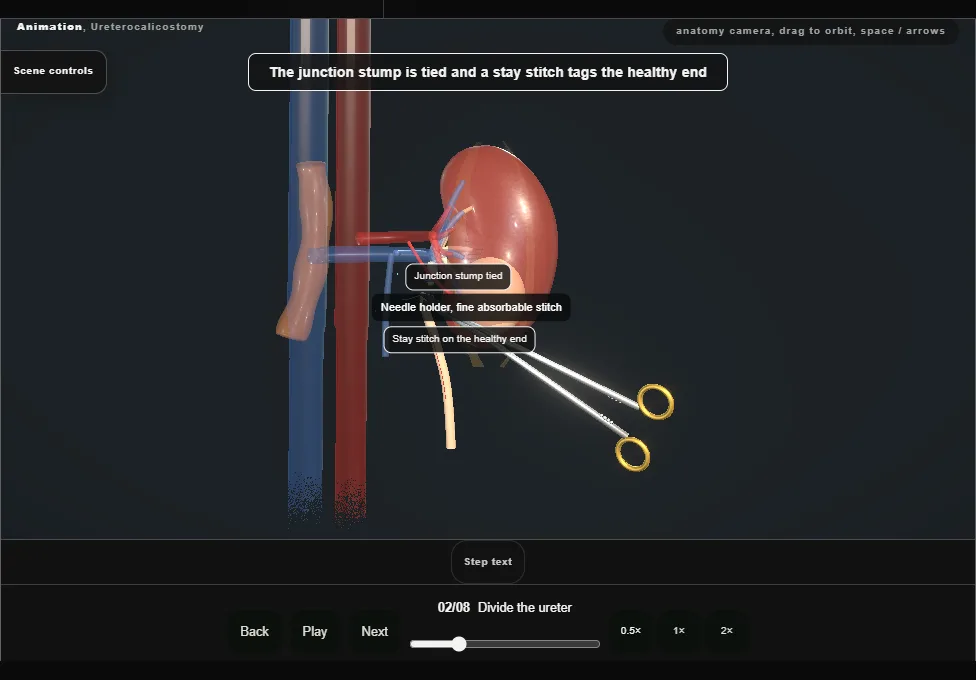
- The ureter is traced down from the scar and divided at its highest healthy point, its adventitia and the vessels in it kept.
- The junction stump is tied and the healthy end tagged with a stay stitch.
- 03
Amputate the lower pole
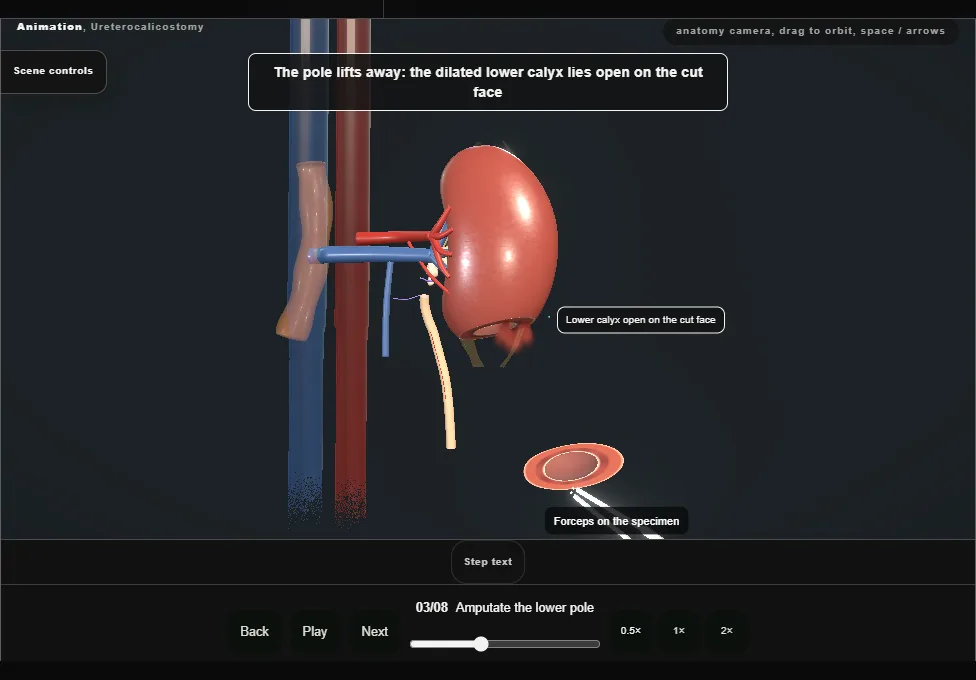
- Diathermy scores the capsule across the lower pole and the scalpel divides the parenchyma along the score, well below the hilum.
- The pole comes away and the dilated lower calyx lies open on the cut face.
- 04
Haemostasis
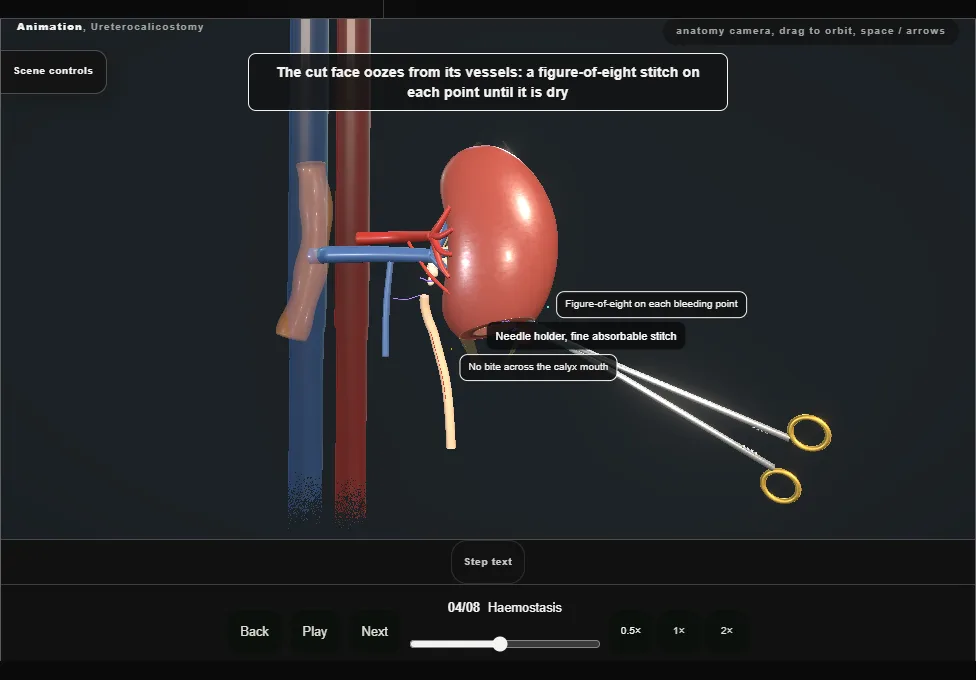
- The parenchymal vessels on the cut face are controlled one by one with figure-of-eight stitches until the face is dry.
- No bite crosses the mouth of the calyx.
- 05
Spatulate the ureter
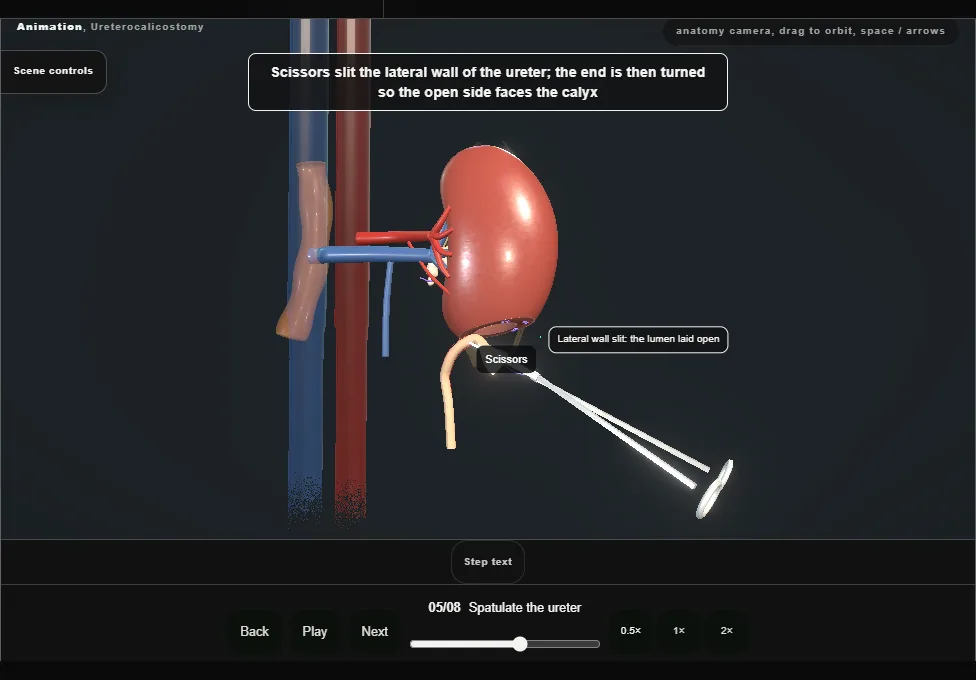
- The healthy ureter is drawn up to the cut face without tension.
- Scissors slit its lateral wall for a generous length, laying the lumen open; the end is then turned so the open side faces the calyx.
- 06
Posterior row
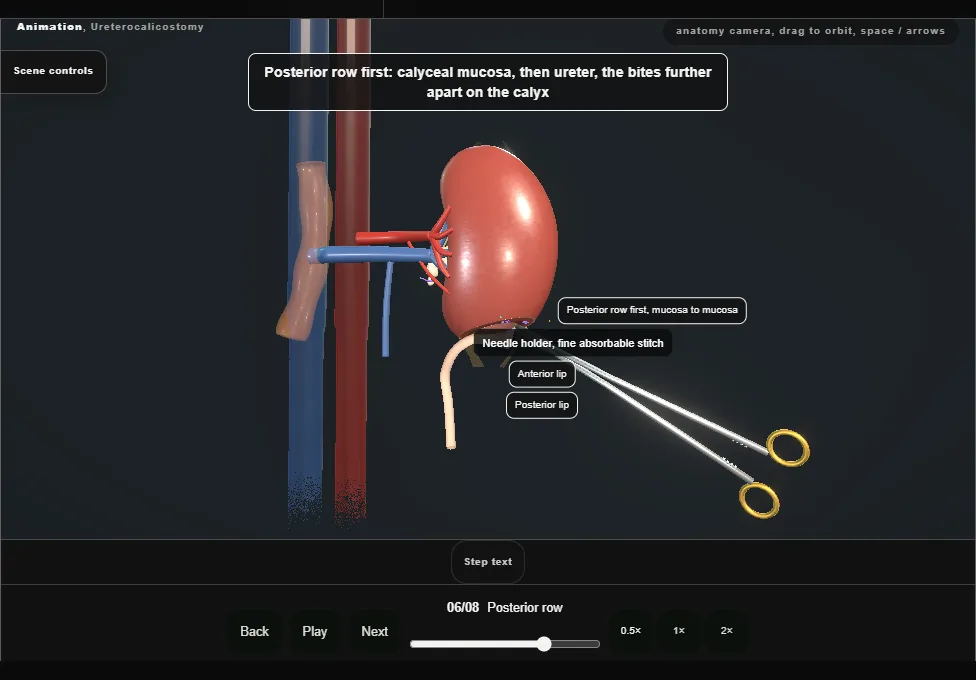
- Interrupted absorbable stitches, mucosa to mucosa: calyceal wall, then ureter.
- The bites lie further apart on the calyx than on the ureter, which is what leaves the join wide.
- The posterior row goes in first.
- 07
Stent and anterior row
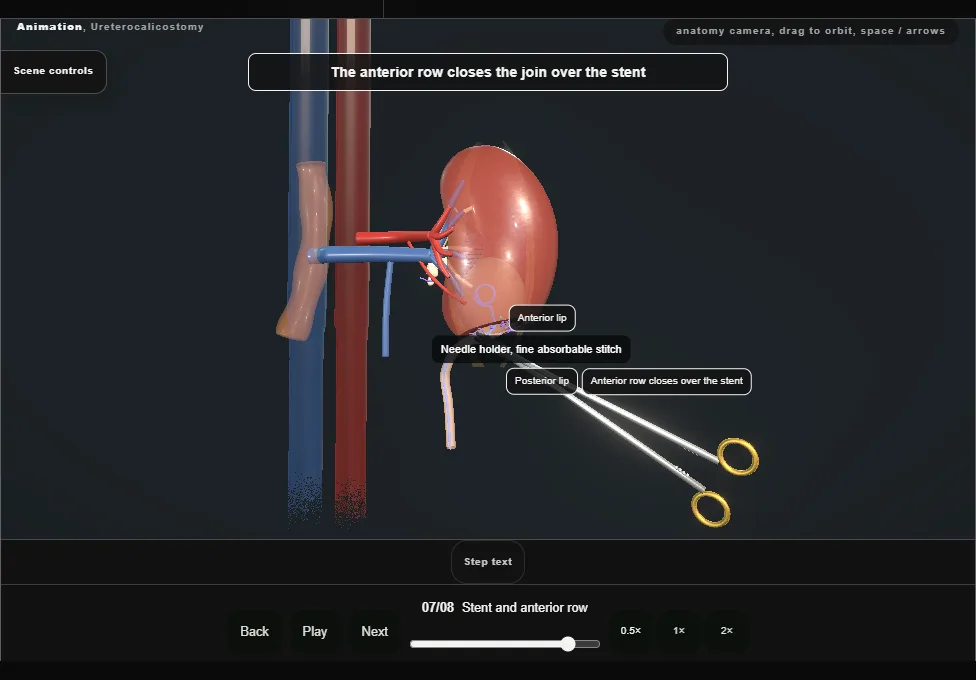
- With the front of the join still open, the JJ stent is passed up into the calyx and down the ureter.
- The anterior row closes over the stent and the join is complete.
- 08
Bolster, capsule and drain
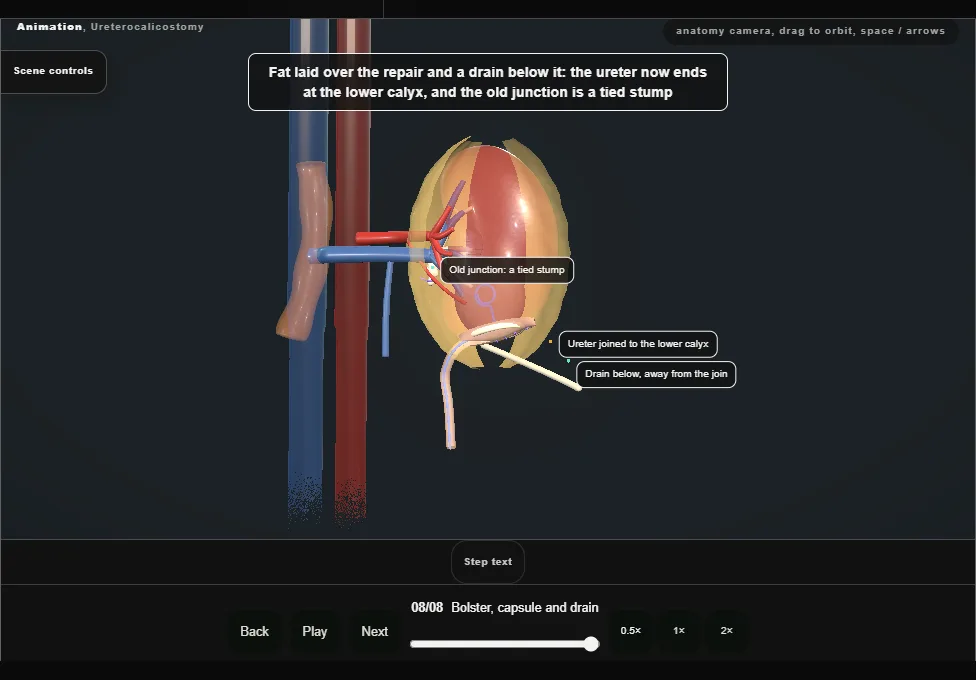
- A haemostatic bolster round the join, the capsule drawn loosely over it to a stitched seam, perirenal fat over the repair, and a drain below, away from the join.
- The ureter now ends at the lower calyx; the old junction is a tied stump.
Derived from kidney/UreterocalicostomyScene.tsx at build time: every step title and caption above is the authored
ProcedureDef text, reproduced verbatim, and this page shares its readable-points renderer with the animation
itself. 8 of 8 steps have a captured frame.
Text fingerprint cc521cc8904b09e2. A caption edit without a re-capture fails the production
check, so the sheet and the animation cannot drift apart silently.